
GTM tension pulley install DIY...


Thread Starter
Registered User
iTrader: (2)
Joined: Oct 2005
Posts: 1,220
Likes: 0
From: The Valley, AZ
Ok... I like this MOD so far, the belt is super tight and no sign of slipping at all... I am hitting 8.8 PSI on the 3.12 pulley and the throttle response seems alot more crisp as well.
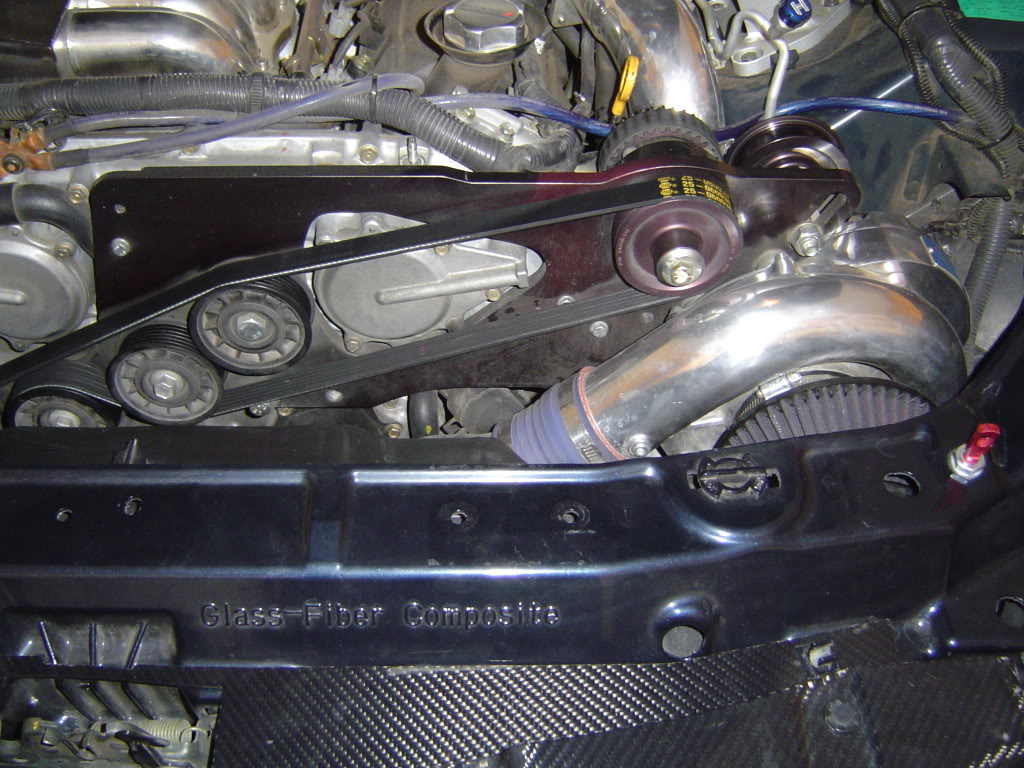
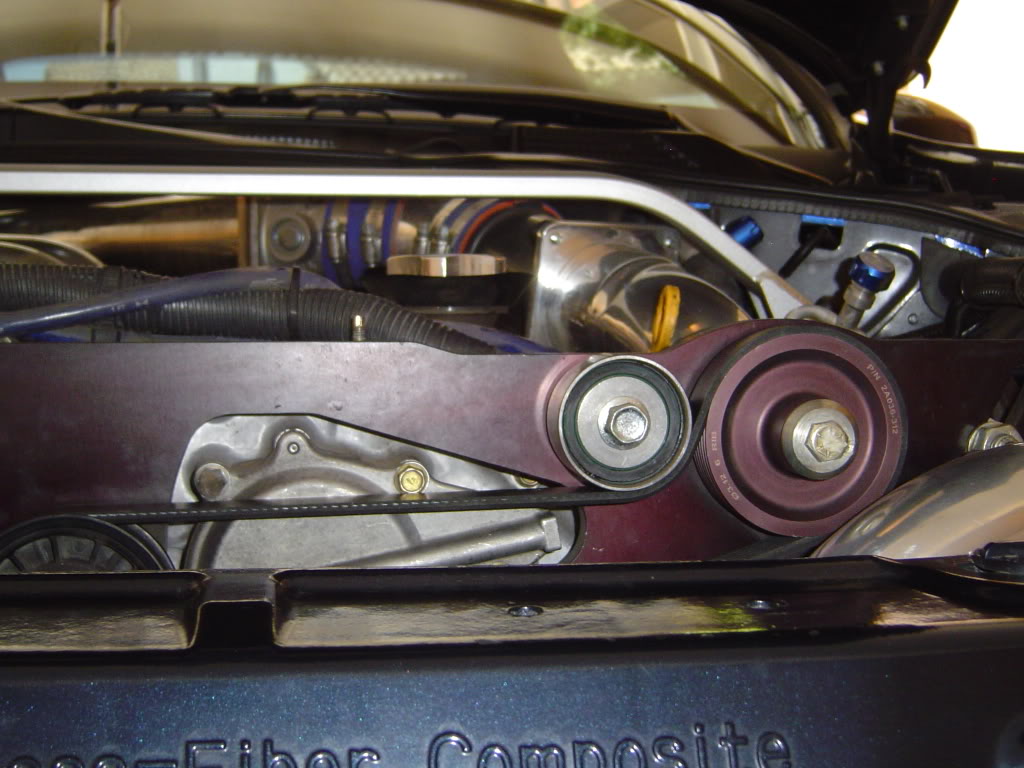
Ok 1st Pic is of stock set up / dirty engine bay, yuk:
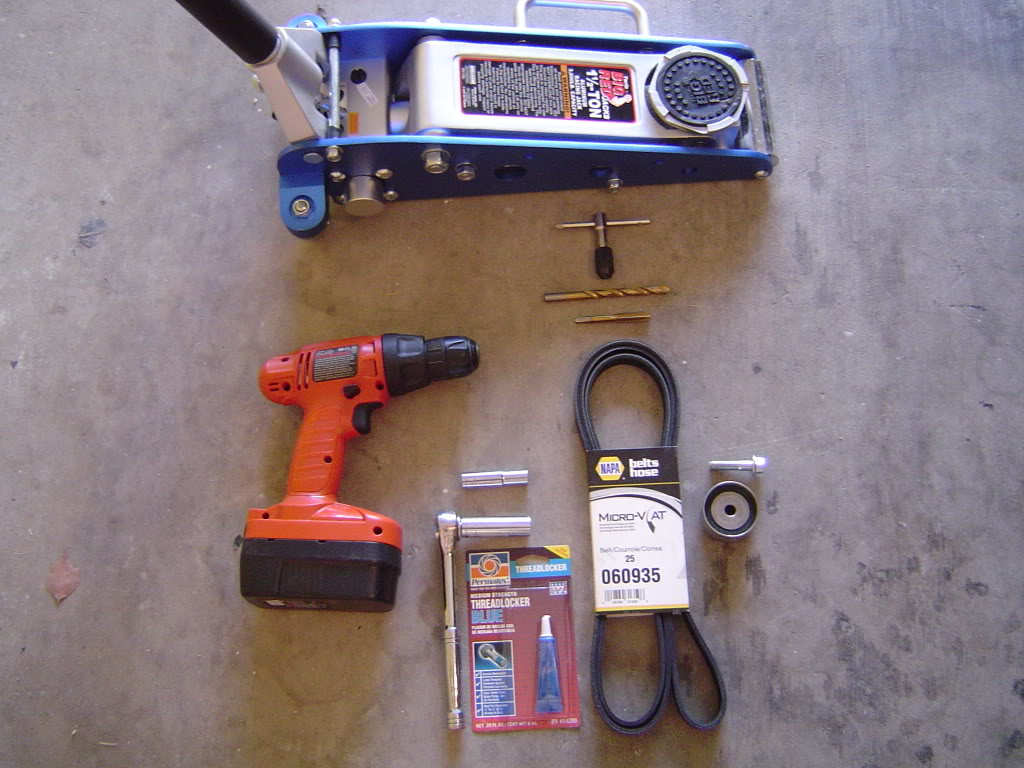
2nd pic: is tools needed: Drill (charged), Jack, rachet and extension...10mm, 12mm, 14mm needed. 10mm drill bit and a 10mm X 1.25 tapper, 060935 NAPA belt, Threadlock (blue), Pulley (GTM), Bolt 10mm x 40 x 1.25... and thats about it.
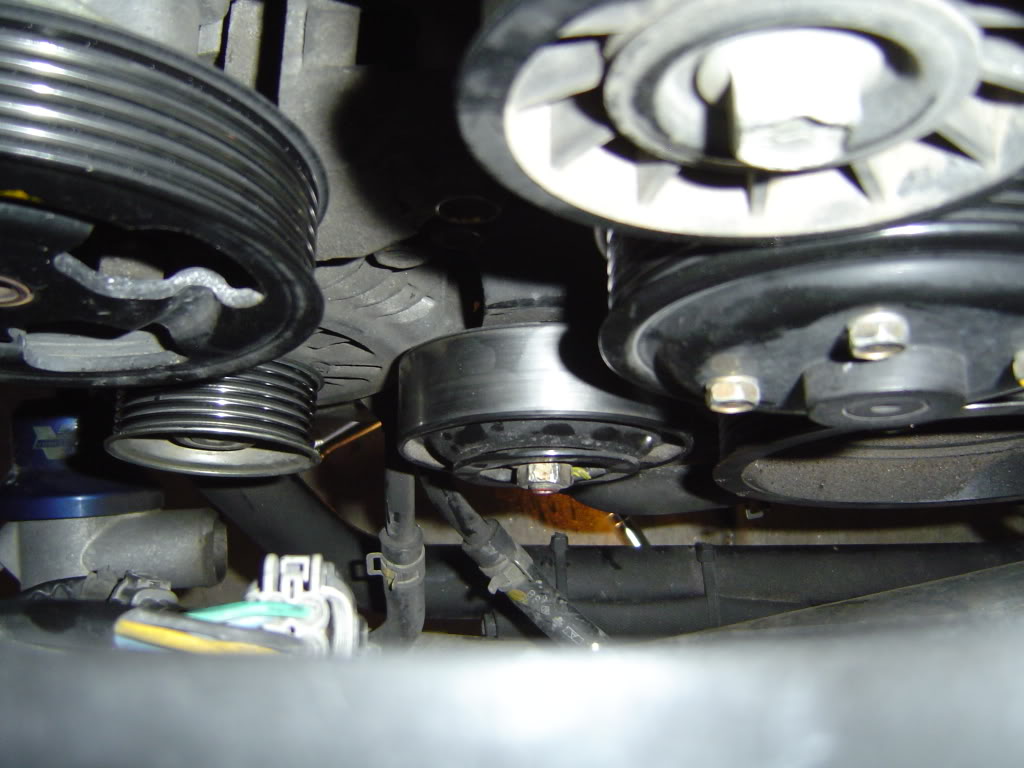
3rd Pic: loosen the bolt on the tensioner pulley (middle pulley in pic) 12mm
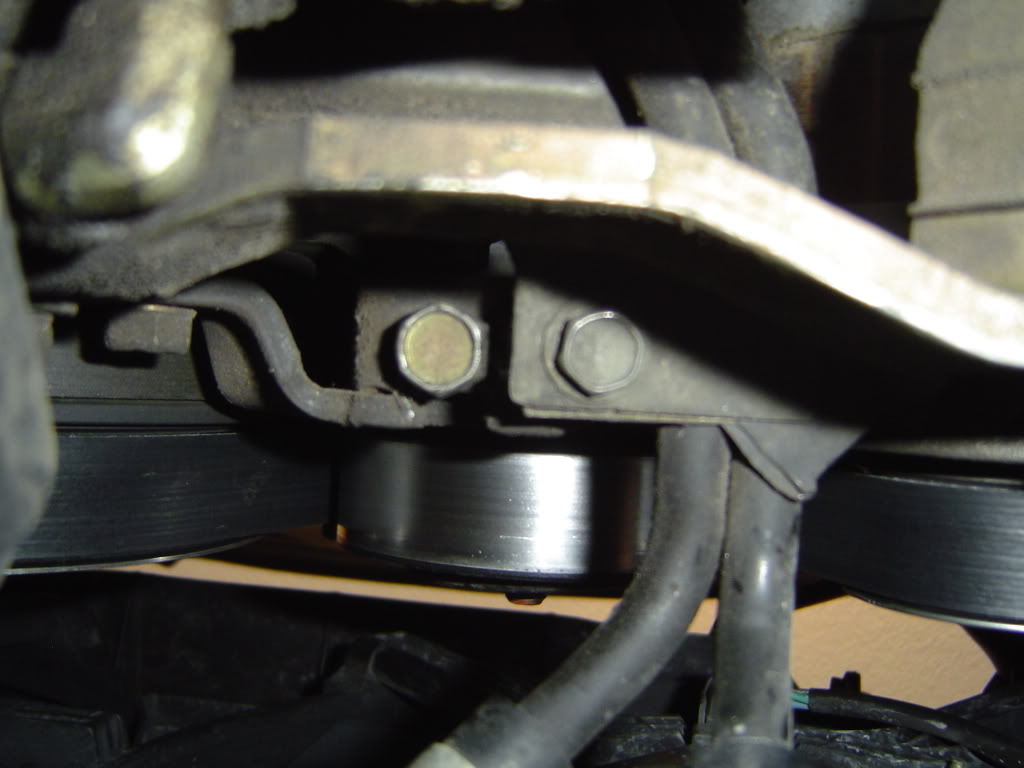
4th Pic: Loosen the the tension on the pulley via the gold colored bolt pictured here in the middle and remove the belt: 12mm w/ extension needed (note: this pic / bolt is under the car looking up)
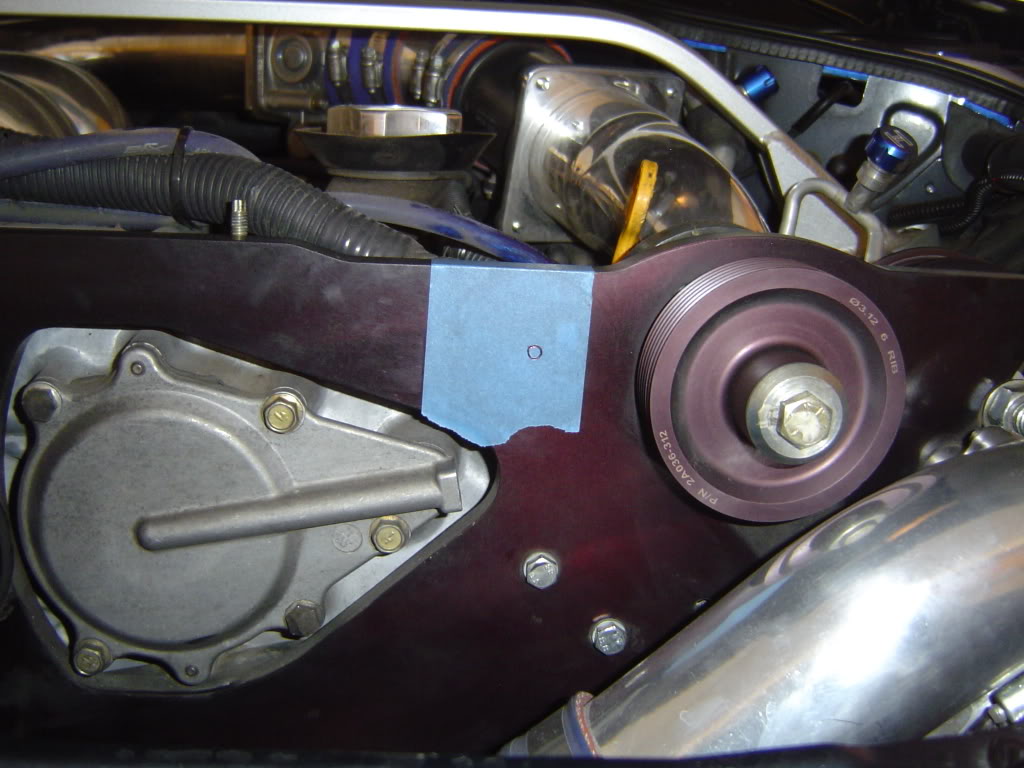
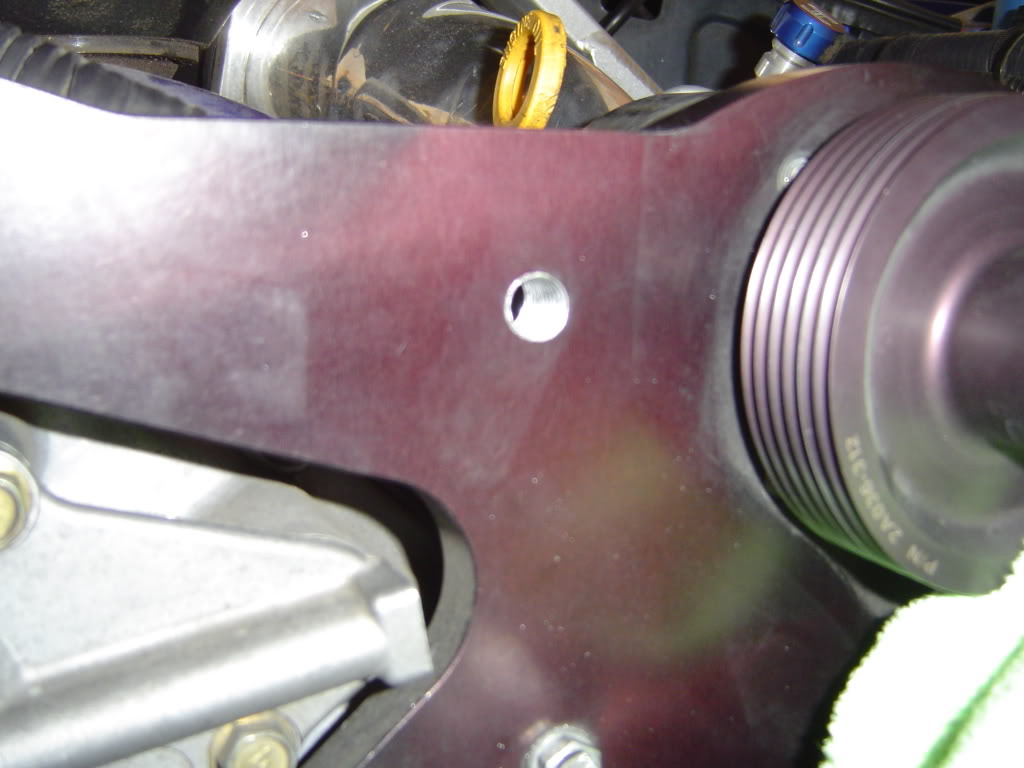
5th Pic: Put painters tape on the area you will be working on. This will be easier to see your mark to drill and will also help the drill bit to bite into the bracket and not slip on you, as well as keep the bracket from chipping. Hold the pulley up backwards and find your optimal place to drill, use a pen to trace the center of the pulley onto the tape... Here you can see my mark.
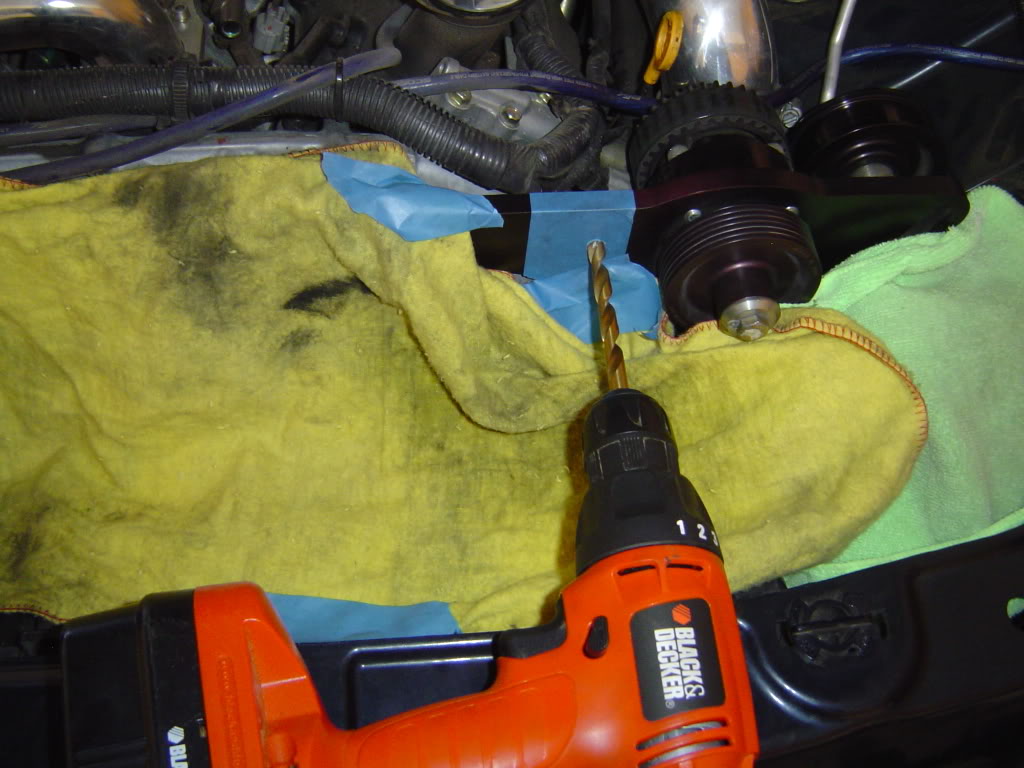
6th Pic: Mask off under where you will be drilling with shop cloths as well as your air filter. You will be drilling into metal and you DO NOT want the shavings getting in your engine bay. Now drill your hole... STRAIGHT.
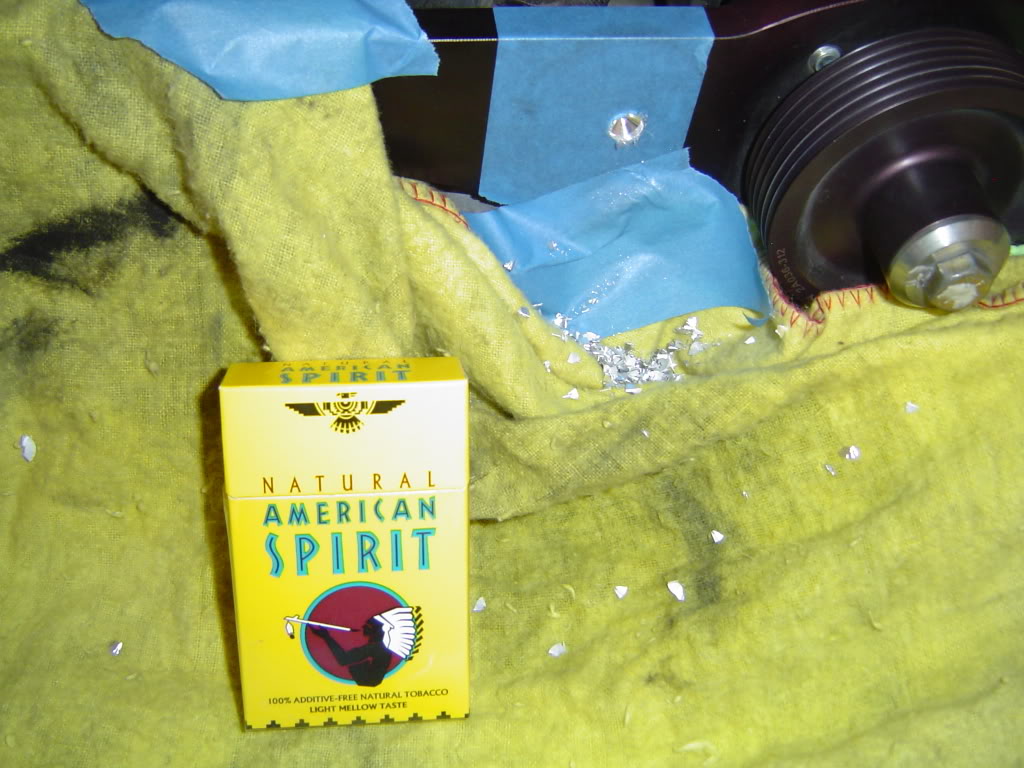
7th Pic: Smoke Break! (Healthy Ciggs )... Had to re-charge the drill. (note the metal shavings)
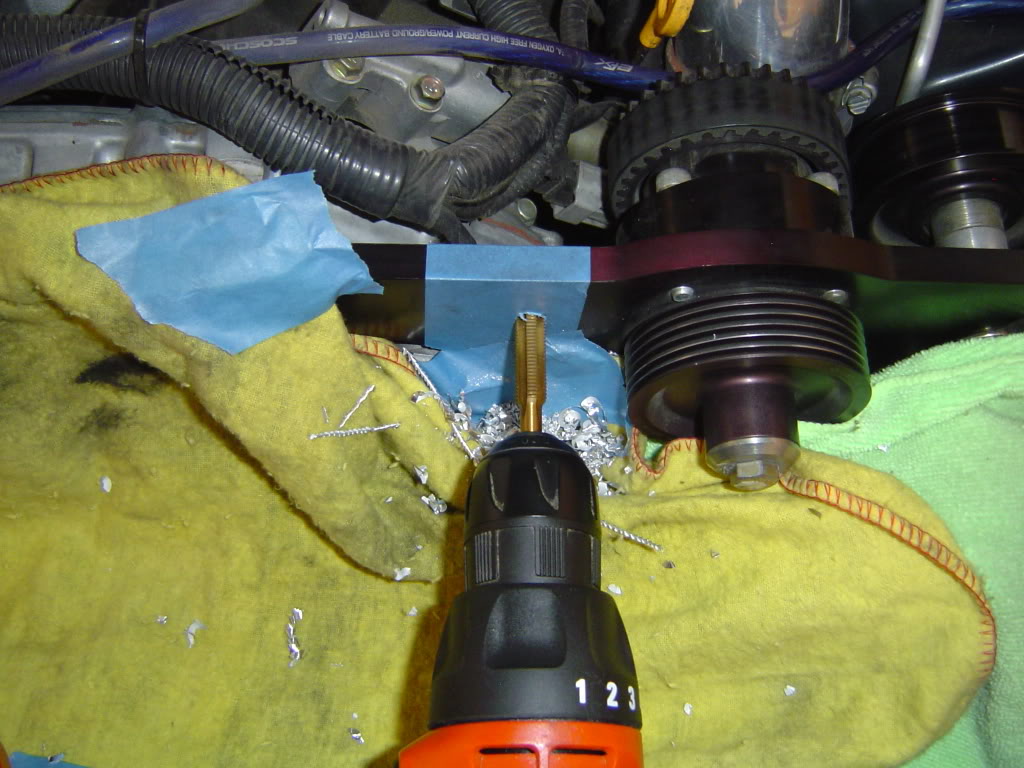
8th Pic: After your hole is drilled, it is time to tap the bracket... (thread it so you can screw the bolt in) I started using my recharageable drill but changed to a corded drill for this as the cordless kept bogging down. Take your time tapping the bracket, you do not want to "F" this up...
9th Pic: completed threaded hole. (note the clean hole, no chipping... painters tape works well for this)
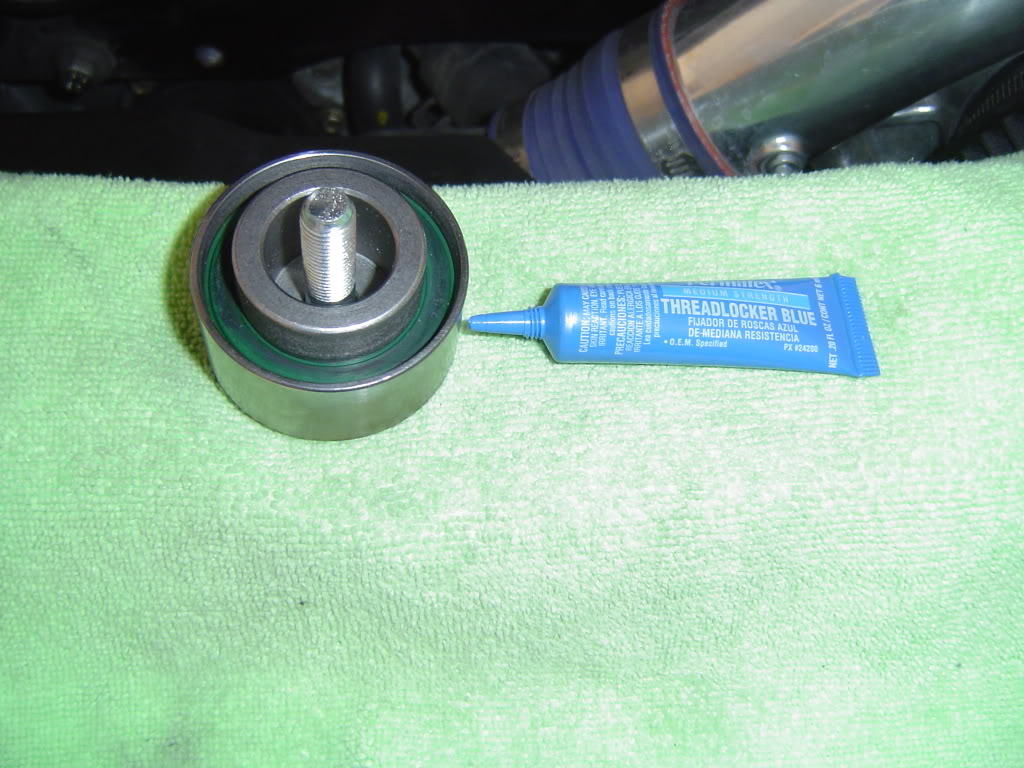
10th Pic: Pulley getting ready to install, use BLUE threadlock on the end of the bolt so if you have to remove in future you can.
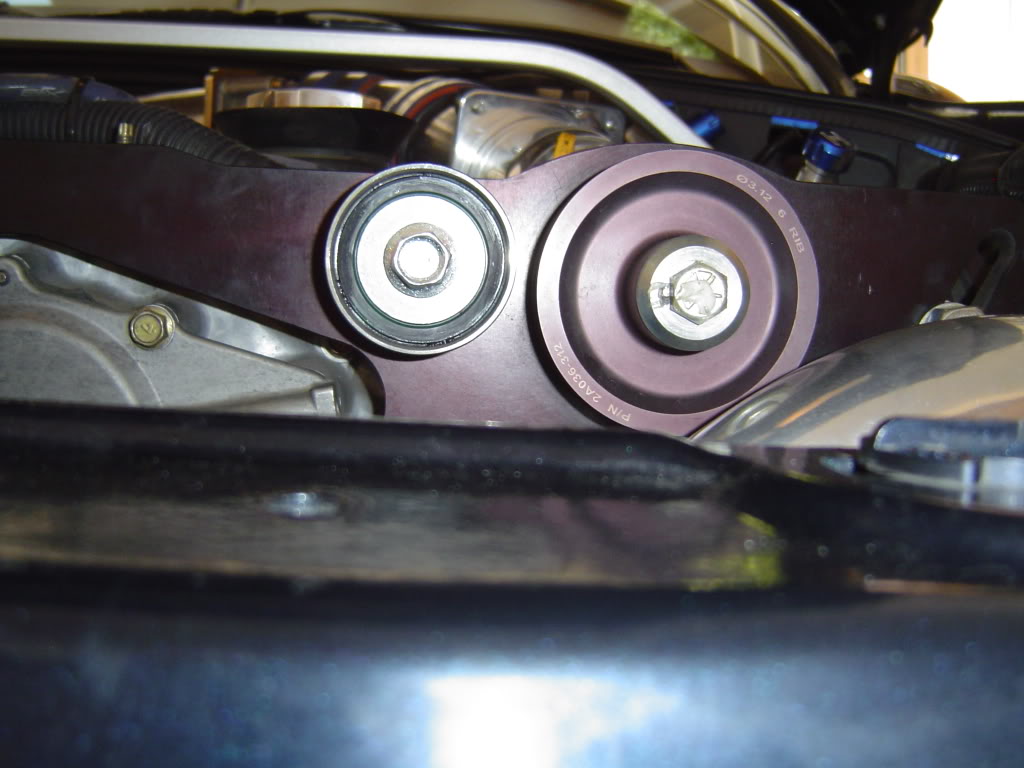
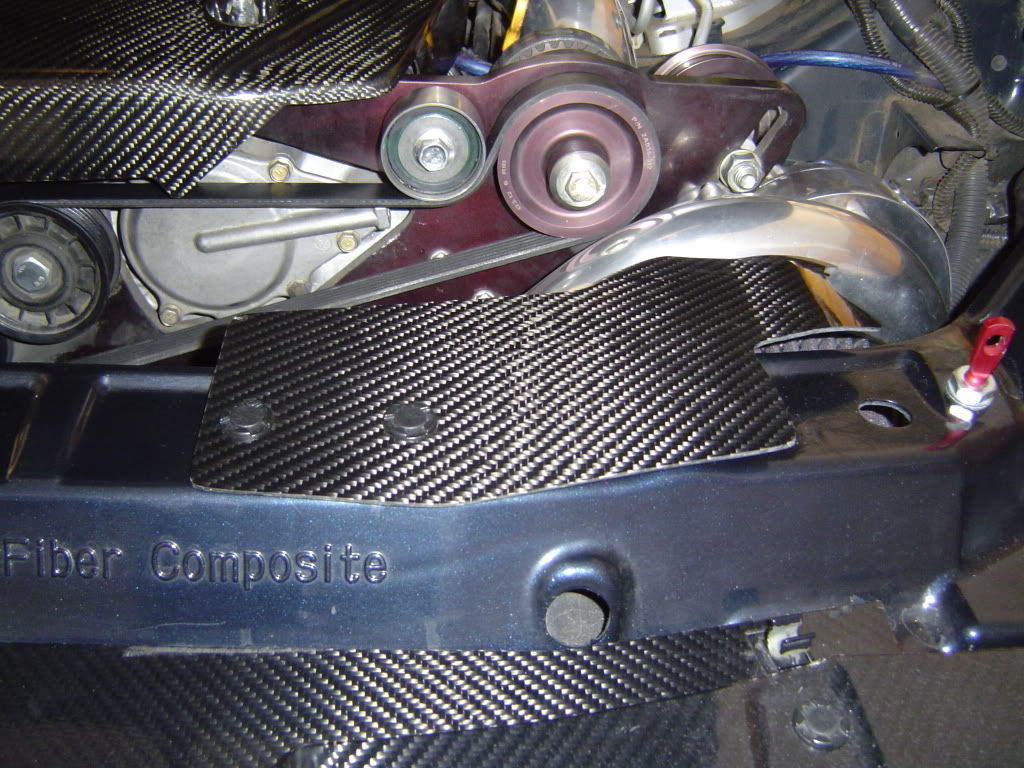
11th Pic: Pulley installed and ready for belt to go back on. 14mm needed here to tighten bolt.
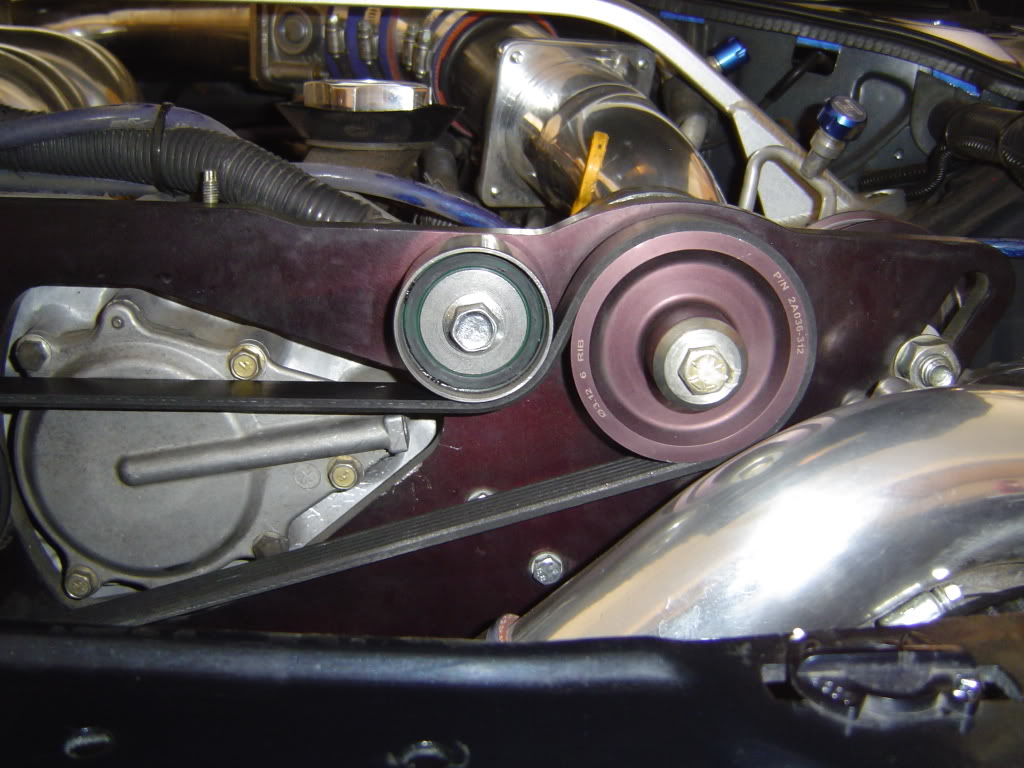
12th & 13th Pic: Belt put back on... This was a Pain in the A$$! It was tight even with tensioner pulley loosened up as much as it could get.
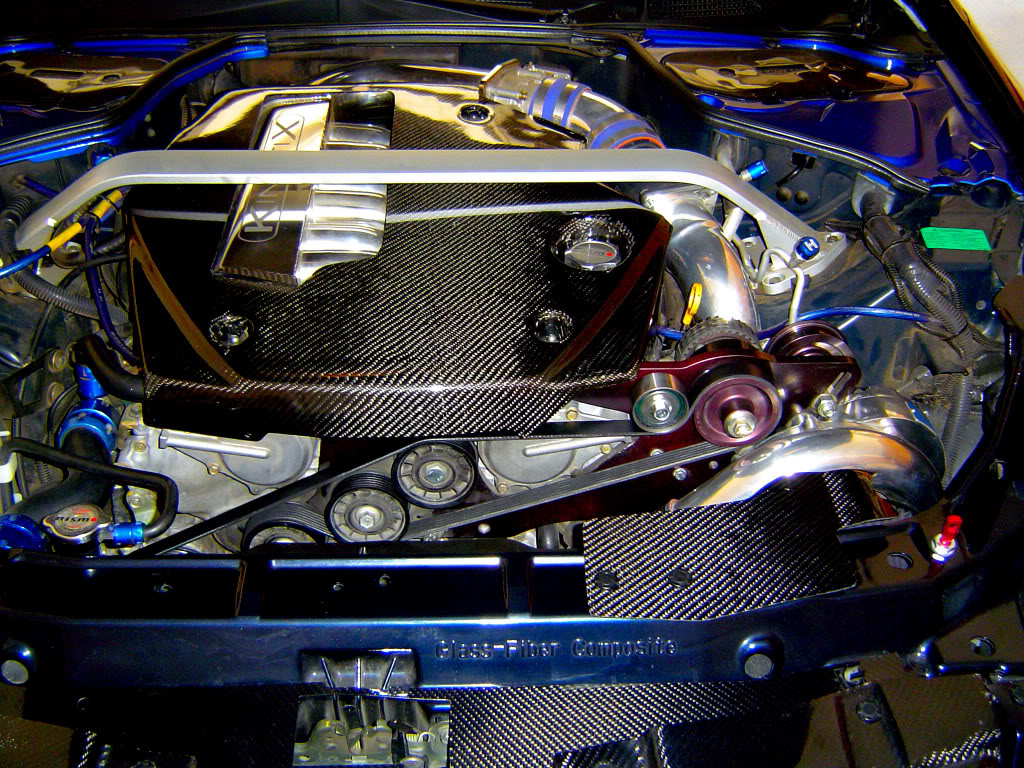
14th & 15th Pic: Buttoning her up to take on a test drive!!
You are now ready to experience non slip Vortech enjoyment!! Now go out and DRIVE!!!
I hope this is found usefull to anyone wanting to do this MoD... Thanks goes out to George and Sam at GTM for the pulley and for calling me when I had a question. I like that kind of service.... Heck, I PM them and Sam picks up the phone and calls me... They don't PM, but actually call you up when you have a question.
Ok 1st Pic is of stock set up / dirty engine bay, yuk:
2nd pic: is tools needed: Drill (charged), Jack, rachet and extension...10mm, 12mm, 14mm needed. 10mm drill bit and a 10mm X 1.25 tapper, 060935 NAPA belt, Threadlock (blue), Pulley (GTM), Bolt 10mm x 40 x 1.25... and thats about it.
3rd Pic: loosen the bolt on the tensioner pulley (middle pulley in pic) 12mm
4th Pic: Loosen the the tension on the pulley via the gold colored bolt pictured here in the middle and remove the belt: 12mm w/ extension needed (note: this pic / bolt is under the car looking up)
5th Pic: Put painters tape on the area you will be working on. This will be easier to see your mark to drill and will also help the drill bit to bite into the bracket and not slip on you, as well as keep the bracket from chipping. Hold the pulley up backwards and find your optimal place to drill, use a pen to trace the center of the pulley onto the tape... Here you can see my mark.
6th Pic: Mask off under where you will be drilling with shop cloths as well as your air filter. You will be drilling into metal and you DO NOT want the shavings getting in your engine bay. Now drill your hole... STRAIGHT.
7th Pic: Smoke Break! (Healthy Ciggs
)... Had to re-charge the drill. (note the metal shavings) 8th Pic: After your hole is drilled, it is time to tap the bracket... (thread it so you can screw the bolt in) I started using my recharageable drill but changed to a corded drill for this as the cordless kept bogging down. Take your time tapping the bracket, you do not want to "F" this up...
9th Pic: completed threaded hole. (note the clean hole, no chipping... painters tape works well for this)
10th Pic: Pulley getting ready to install, use BLUE threadlock on the end of the bolt so if you have to remove in future you can.
11th Pic: Pulley installed and ready for belt to go back on. 14mm needed here to tighten bolt.
12th & 13th Pic: Belt put back on... This was a Pain in the A$$! It was tight even with tensioner pulley loosened up as much as it could get.
14th & 15th Pic: Buttoning her up to take on a test drive!!
You are now ready to experience non slip Vortech enjoyment!! Now go out and DRIVE!!!
I hope this is found usefull to anyone wanting to do this MoD... Thanks goes out to George and Sam at GTM for the pulley and for calling me when I had a question. I like that kind of service.... Heck, I PM them and Sam picks up the phone and calls me... They don't PM, but actually call you up when you have a question.
Last edited by Triji; Dec 11, 2007 at 12:48 PM.

looks great!
This is a lot less hassle than TIMROD's belt setup. I'd jump on doing this for my car except I haven't had any belt slip issues yet with TIMROD's belt setup and extra pulley under the jackshaft
yeah GTM has great customer service. Sam actually dug up my number and called me one time about a post I made online about something my car was doing.
hard to describe, but it should have a little bit of give. It shouldn't be so tight that the belt doesn't move much. It'll vary a little depending on what section of the belt you move - like if it's one of the longer stretches or not.
If I had to guess, I'd say it sounds like you might have your belt a little too tight, but I really don't know without looking at it myself
the belt itself is going to get hot right there with the pulleys being so close together and the sudden angle change
If I had to guess, I'd say it sounds like you might have your belt a little too tight, but I really don't know without looking at it myself
the belt itself is going to get hot right there with the pulleys being so close together and the sudden angle change
The belts will get very hot period.. There should be a few mm's of give.. If you tighten too much youll find out soon enough.. It will basically take some R & D from you.. and some $$ on belts.. BTW there could be a recommendation on the vortech manual with the recommended belt tension specs..
Good luck!
Good luck!

I'm not a SC expert or anything, but I would loosen it all the way (since you say it's pretty tight w/o it tightened at all), and tighten it just until you don't get any slip, that way it won't get too tight.
Last edited by failsafe306; Sep 9, 2007 at 03:38 PM.
Originally Posted by failsafe306
I'm not a SC expert or anything, but I would loosen it all the way, and tighten it just until you don't get any slip, that way it won't get too tight.
 jk..
jk..Unless he can feel slip or watch it on a dyno..

Trending Topics

Thread Starter
Registered User
iTrader: (2)
Joined: Oct 2005
Posts: 1,220
Likes: 0
From: The Valley, AZ
Thanks for the props guys
I got back under her and loosened up the belt a tad bit. She feels much better now (not like it is about to snap) and another thing I noticed is that the blower is actually much quieter at idle than it was prior to the pulley install. Doesn't sound like a cement mixer at a stoplight anymore
I got back under her and loosened up the belt a tad bit. She feels much better now (not like it is about to snap) and another thing I noticed is that the blower is actually much quieter at idle than it was prior to the pulley install. Doesn't sound like a cement mixer at a stoplight anymore
Thread Starter
Registered User
iTrader: (2)
Joined: Oct 2005
Posts: 1,220
Likes: 0
From: The Valley, AZ
Originally Posted by Quamen
Just wondering, after you mounted the tensioner pulley, how rigid did it feel?
No deflection since it is not a remarkably large bolt?
No deflection since it is not a remarkably large bolt?
The pulley is dead center straight. With the amount that is inset and threaded into the bracket w/ threadlock I do not think I have to worry about it becoming un-plum.
Thread Starter
Registered User
iTrader: (2)
Joined: Oct 2005
Posts: 1,220
Likes: 0
From: The Valley, AZ
Originally Posted by booger
Good job Triji !!
You should be able to have the belt at a normal tention . Like you would for any serp belt , maybe slightly tighter .
You should be able to have the belt at a normal tention . Like you would for any serp belt , maybe slightly tighter .
I have the belt at a much better tension now I believe. I think I could even get a one size longer belt next time for the 3.12... I think this belt is more for the 2.87 with this set up... I actually had to use a long bladed screw driver to leverage the belt on... hehe...

Thread Starter
Registered User
iTrader: (2)
Joined: Oct 2005
Posts: 1,220
Likes: 0
From: The Valley, AZ
Contact Sam at GTM.... I think total with the pulley, belt, and bolt was about $120 or so shipped. Worth it IMO since I am soon to go to the 2.87 and do not want the slippage.
I also saw the new Vortech belt set up on a '03 "G" tonight and believe this is almost a "must have" for the way they are now routing the belts. It almost looked to me that there were to many long runs between pulleys on the new set up for some reason which would lead me to believe there is more room for slippage.
I also saw the new Vortech belt set up on a '03 "G" tonight and believe this is almost a "must have" for the way they are now routing the belts. It almost looked to me that there were to many long runs between pulleys on the new set up for some reason which would lead me to believe there is more room for slippage.
Thread Starter
Registered User
iTrader: (2)
Joined: Oct 2005
Posts: 1,220
Likes: 0
From: The Valley, AZ
Thanks alot Sam! I definately will!... I am thinking about a map selector switch before I tackle installing that Utec...
I am hoping to get the Utec / injectors / 2.87 done within the next 2 weeks.
I am hoping to get the Utec / injectors / 2.87 done within the next 2 weeks.

that's one small idler pulley. it is gonna being spinning at some extreme speeds; looks like it'll be spinning more than 2X the blower speed. I hope the bearing is up the task.
I mention this beacause ATI used to use smaller idler pullies on some of thier mustang kits; the bearings would end up failing.
when the bearing failed, it would sezie up, but the belt was still forcing the pulley to spin. The pulley would turn red hot, and either shear the pulley right off it mount and/or the belt would start to cook!
Last edited by QuadCam; Sep 10, 2007 at 06:13 AM.