DIY: DETAILED wheel stud replacement (front & rear ARP wheel stud friendly)
 08-16-2007, 06:28 PM
#1
Retired Admin
Thread Starter
iTrader: (95)
I broke yet another wheel stud and instead of paying the dealership $70 to do it, I decided to do it myself this time. I spent $4.04 (for replacement stud) + $1.00 (for 6 washers). This sure beats paying somebody else to do the work and is definitely more gratifying. 
Hopefully, this DIY helps you guys who need their wheel stud(s) replaced.
level of difficulty:
1.5 out of 5 (5 being hardest)
approximate install time:
45-90 minutes
tools:
floor jack and jack stands
socket wrench/ratchet
14mm (9/16") and 19mm (3/4") sockets
wd-40 or pb blaster or liquid wrench
~6 washers
hammer or mallet
Replacing the wheel stud:
*I did the rear left side. The fronts should involve the same steps, but may or may not require different socket sizes.
1: Jack up the car high enough using the standard jack points (or frame) so you can slide under the car easily.

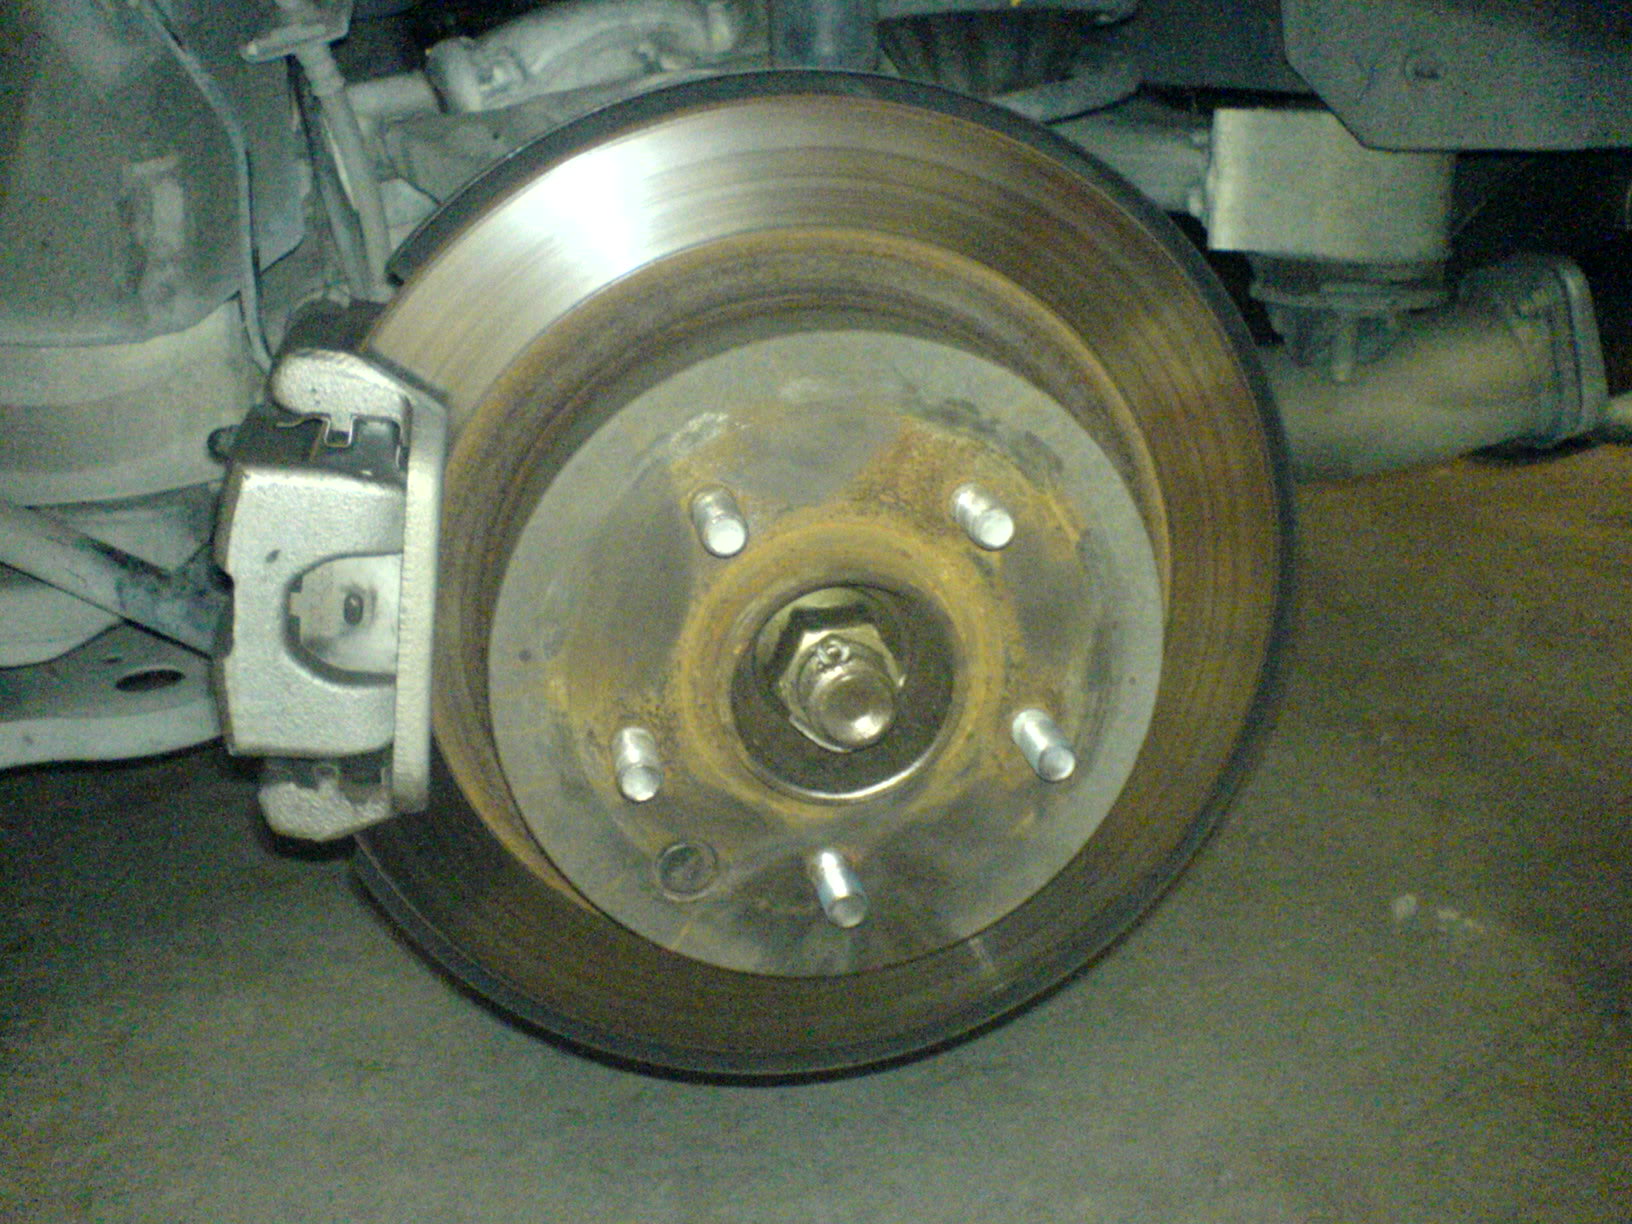
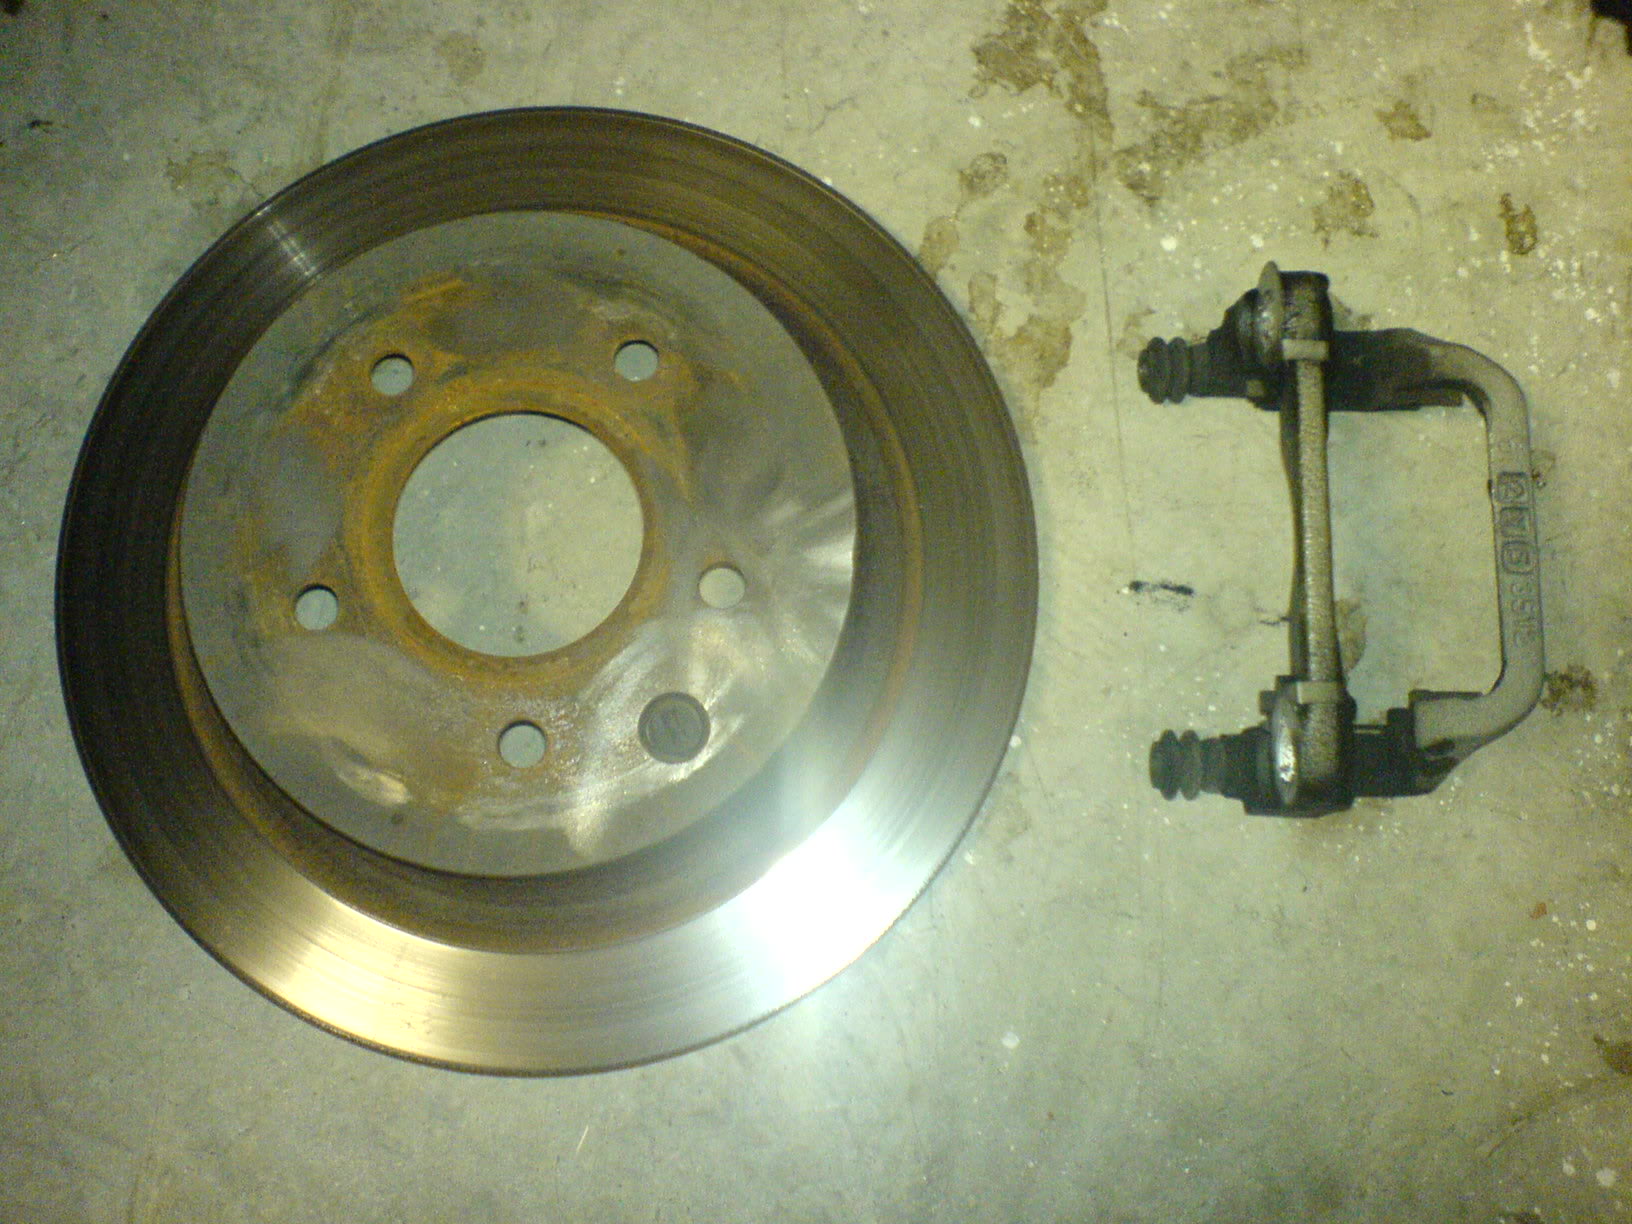
2: Remove the wheel, exposing the studs, rotor, brake components, etc.
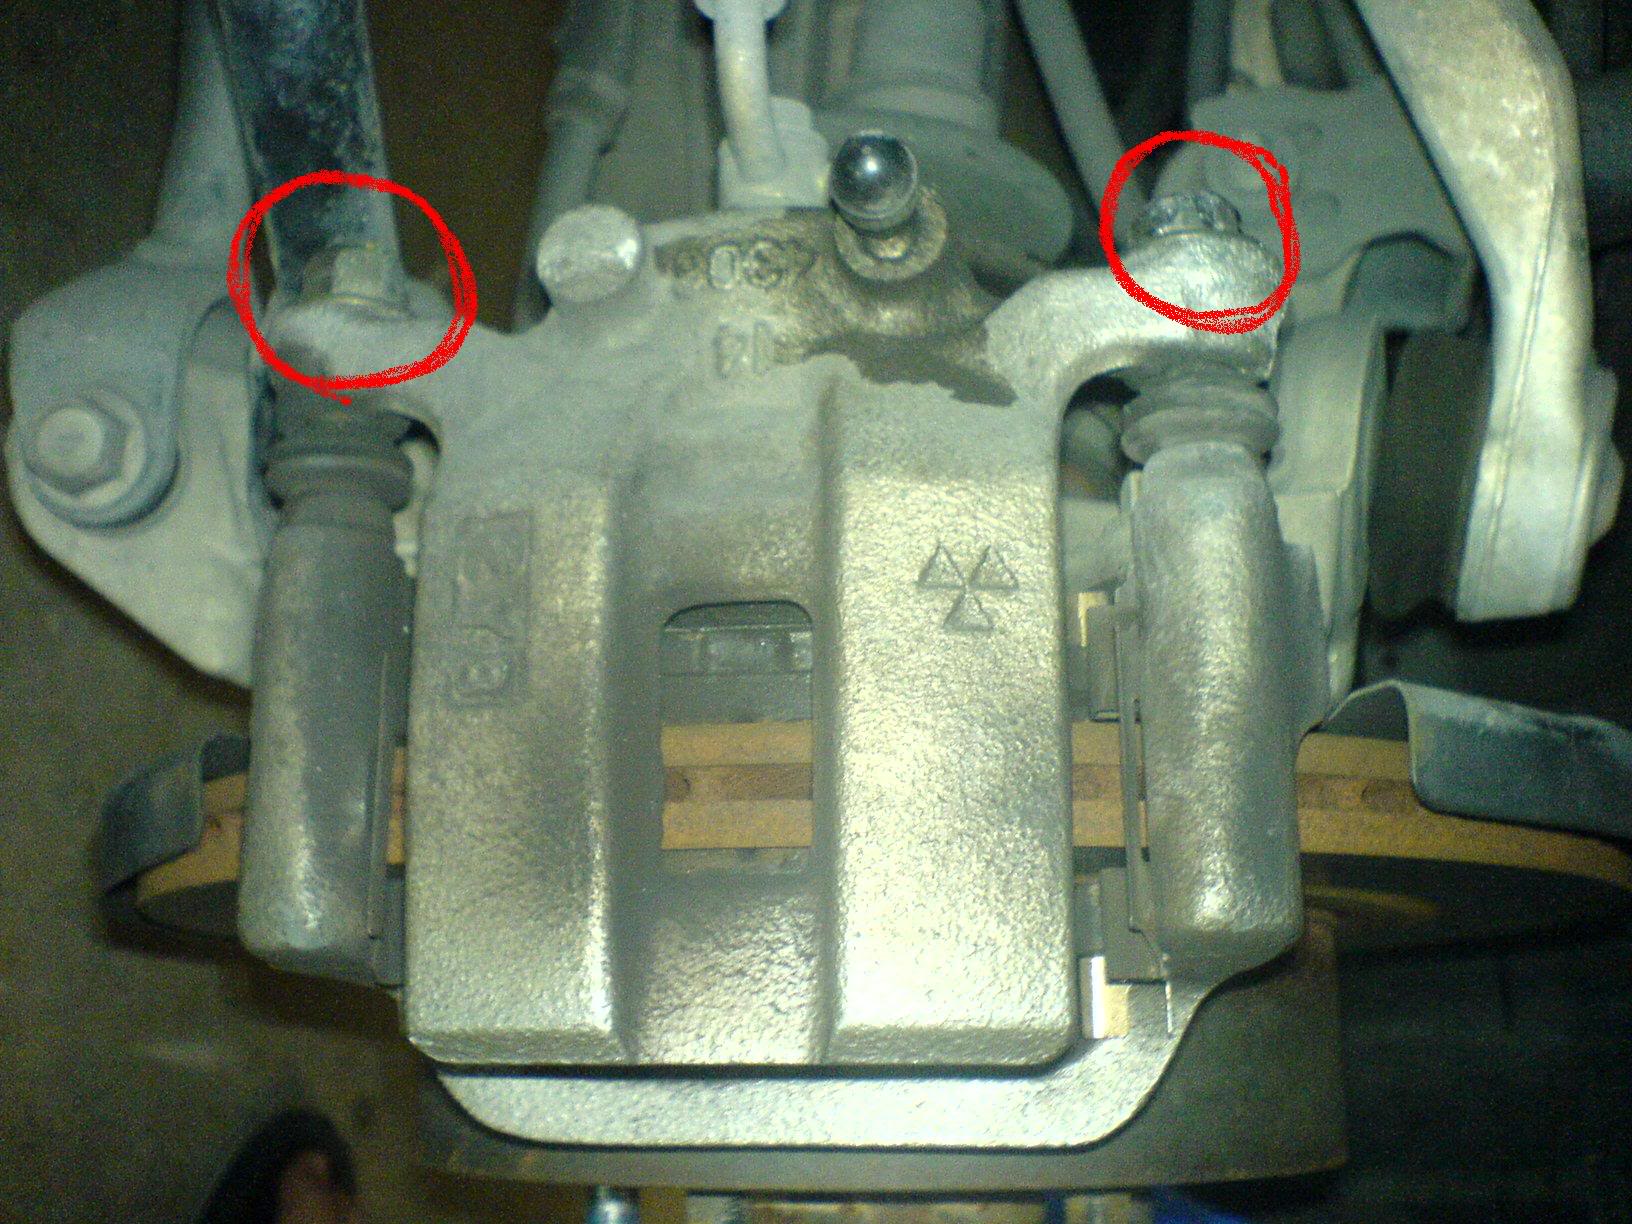
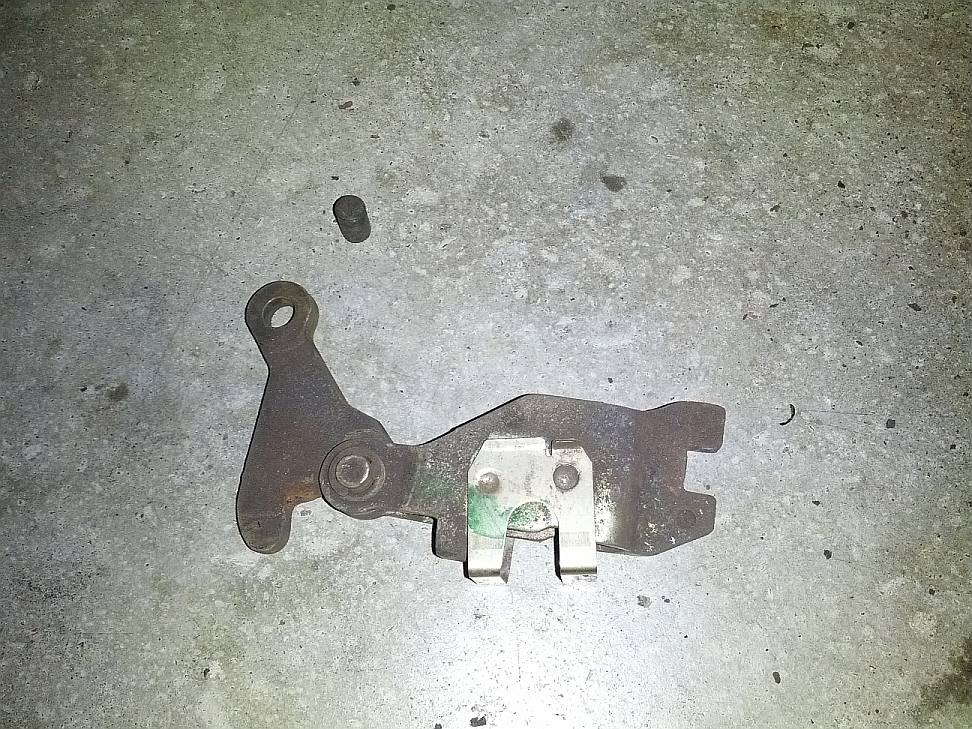
3: Locate the two 14mm bolts holding the brake caliper in place and remove them.
*Spraying the bolts with wd-40/pb blaster/liquid wrench makes the job much easier, especially if these bolts have not been removed recently.
**The bottom bolt cannot be taken off due to limited space behind it, so I used my floor jack to push up the suspension to create more space.
4: Put the bolts some place where the grease won't collect stuff off the ground.
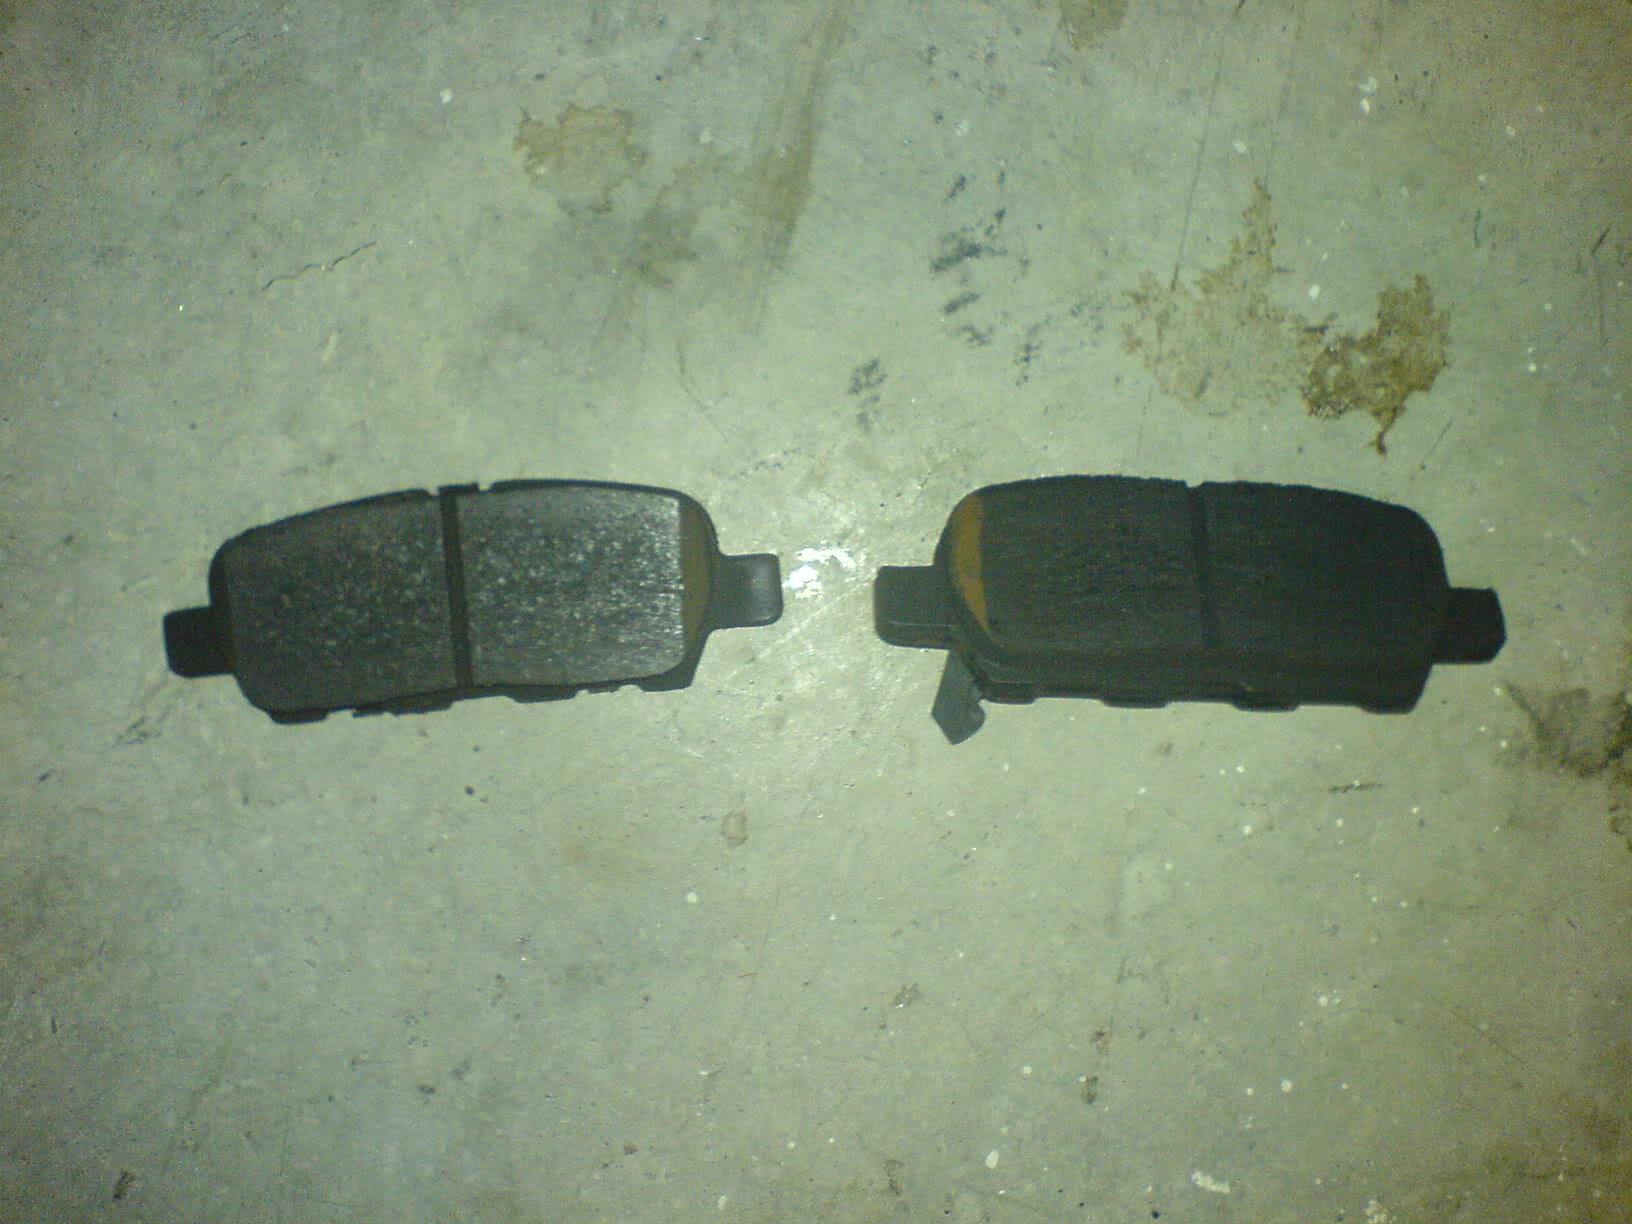
5: Rest the brake calipers so that it does not put any strain (put weight on) the brake lines. Take off the brake pads, if you haven't already.
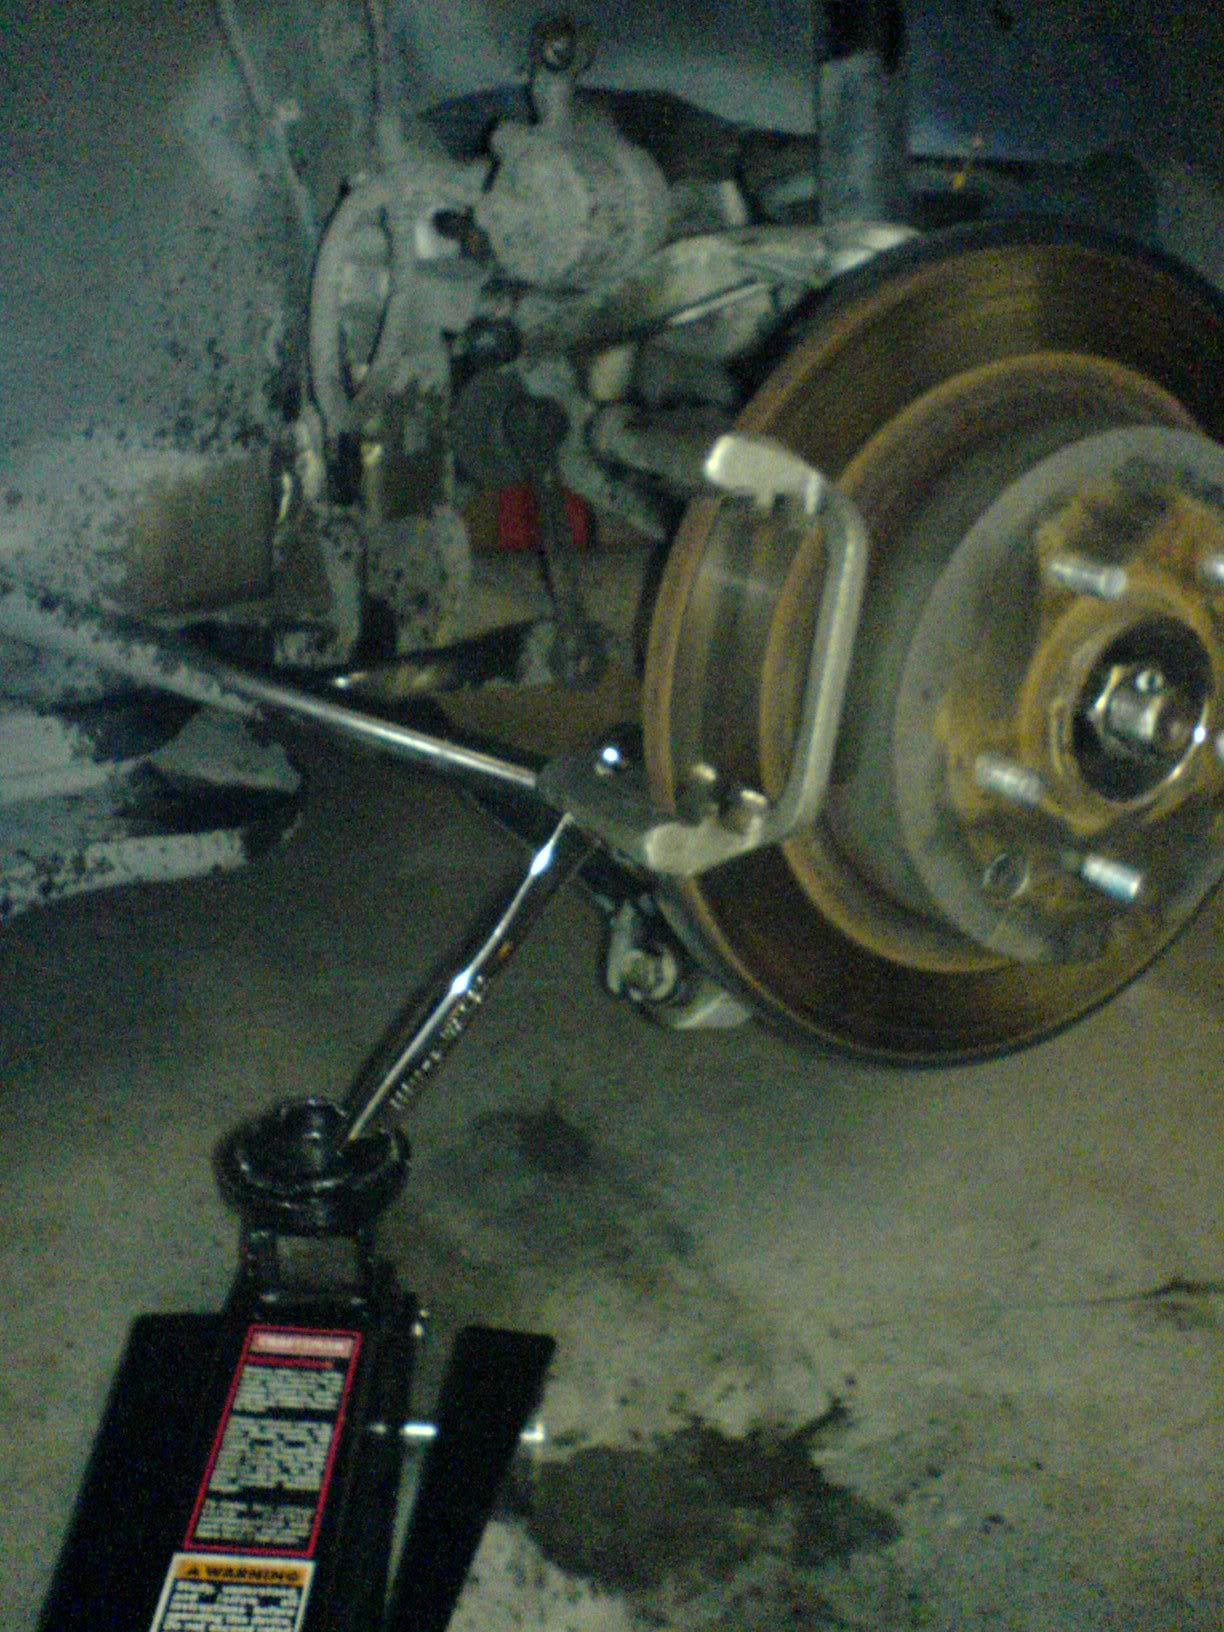
6: Locate the two 19mm bolts holding the brake caliper bracket in place and remove them.
*Spraying the bolts with wd-40/pb blaster/liquid wrench makes the job much easier, especially if these bolts have not been removed recently.
**I couldn't take off the bolts by hand so I used the floor jack (while making sure the socket is on the bolt completely as to not strip it).

7: Put the bolts some place where you won't lose them.
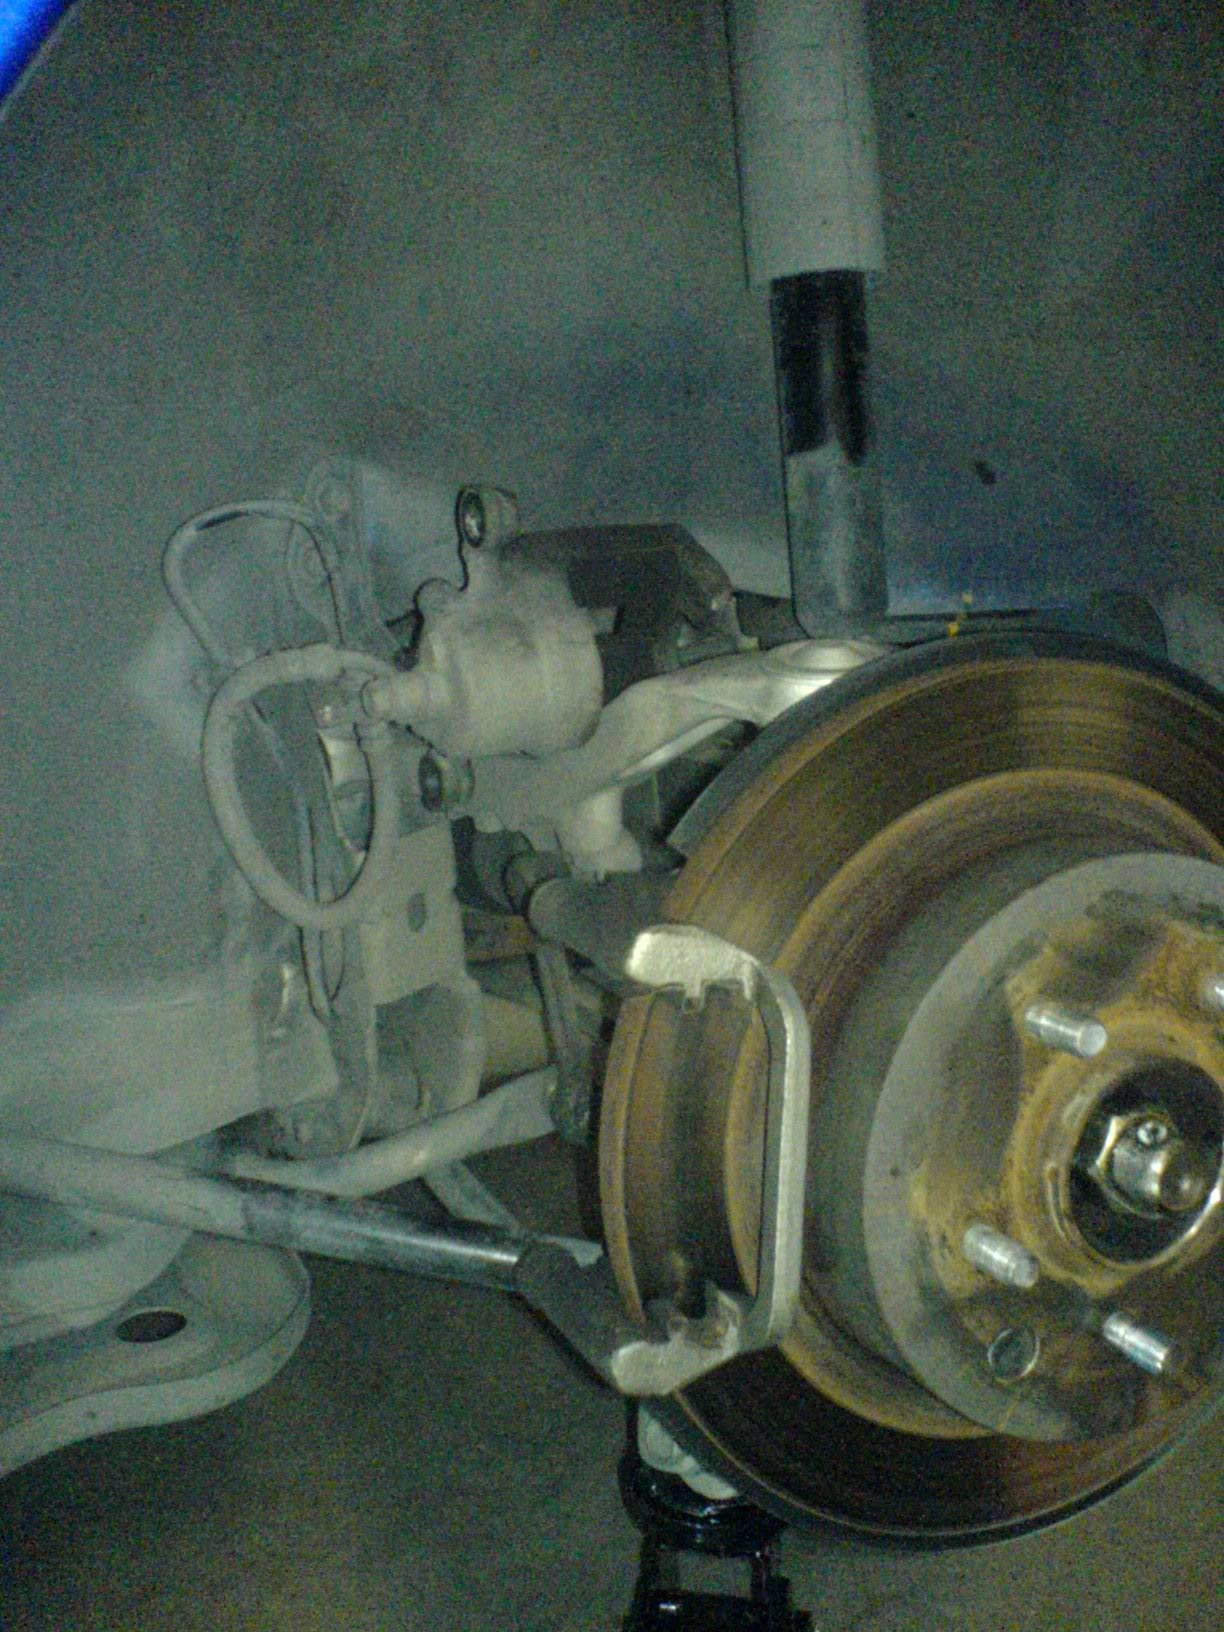
8: Remove the brake caliper bracket and the rotor and set it aside. They should just slide right out.
9: Spray wd-40/pb blaster/liquid wrench where the broken stud is and around it. Hammer away at the broken stud. (Optional: thread in an old/useless lug nut a little bit for added length and to prevent the stud from flying somewhere)
*Alternatively, you can use a C-clamp or something similar to get the stud out, if you don't feel comfortable hammering.
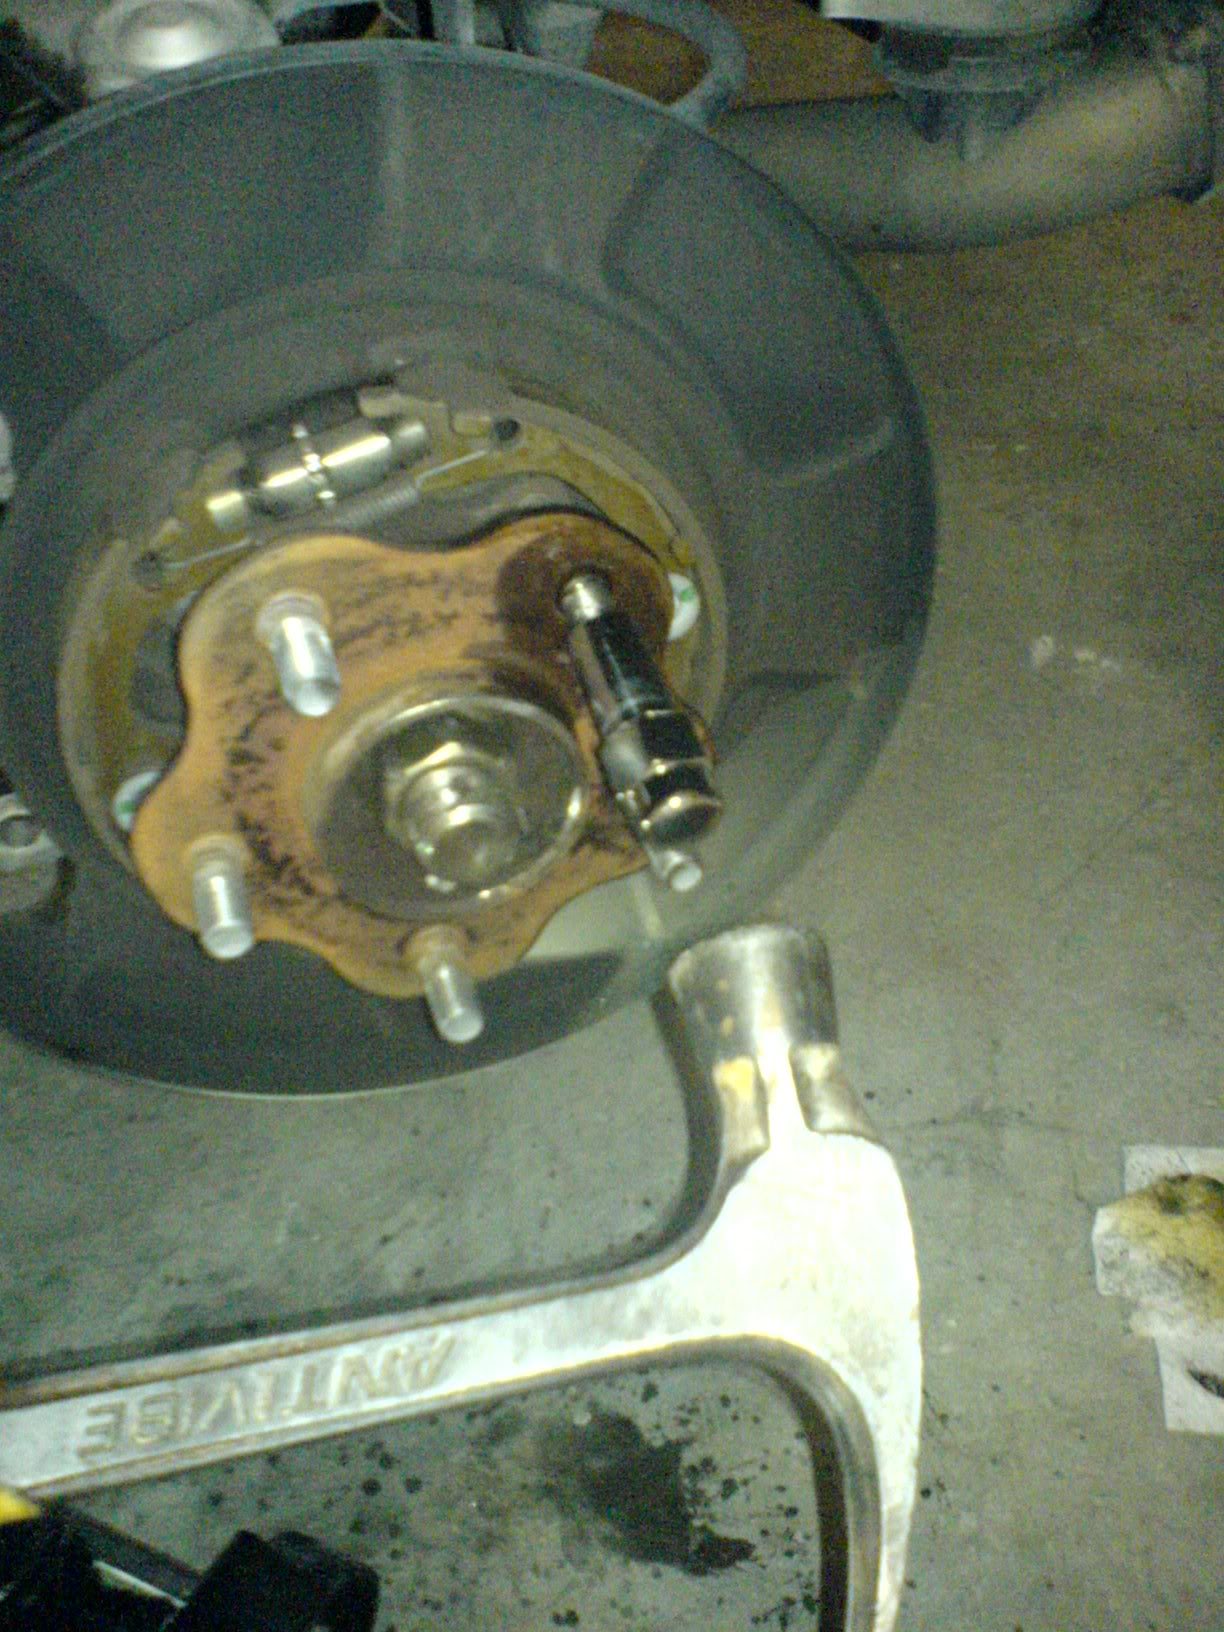
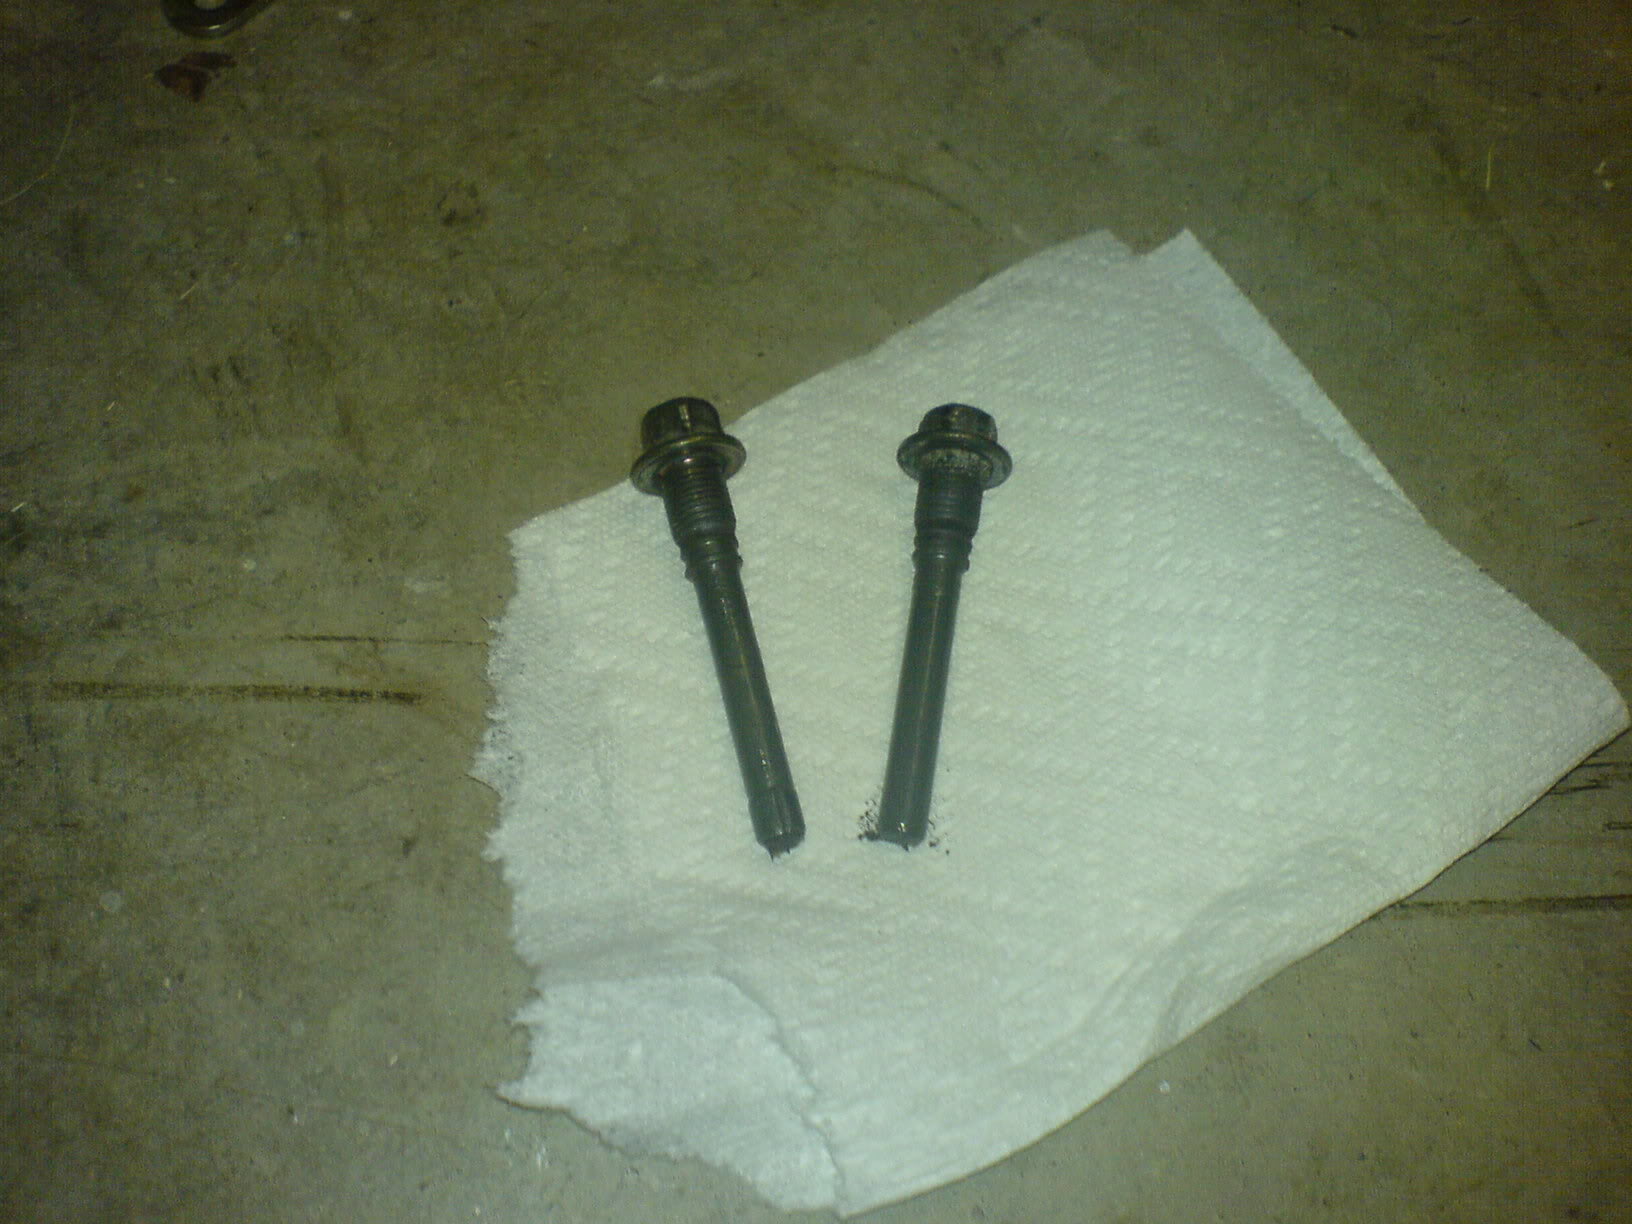
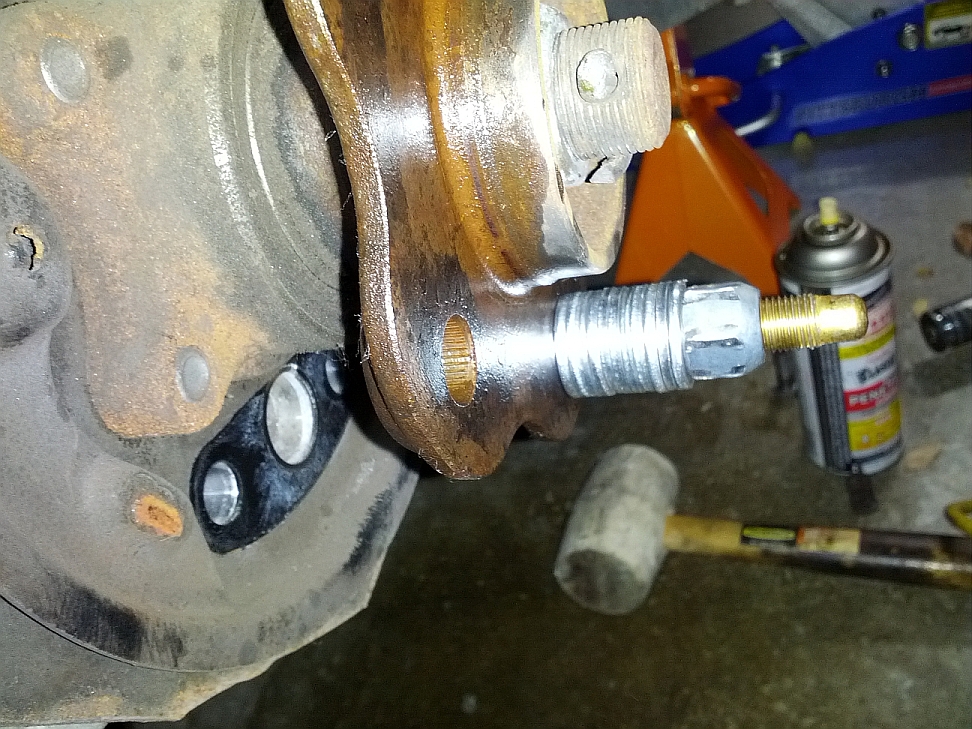
10: Take out the broken stud.
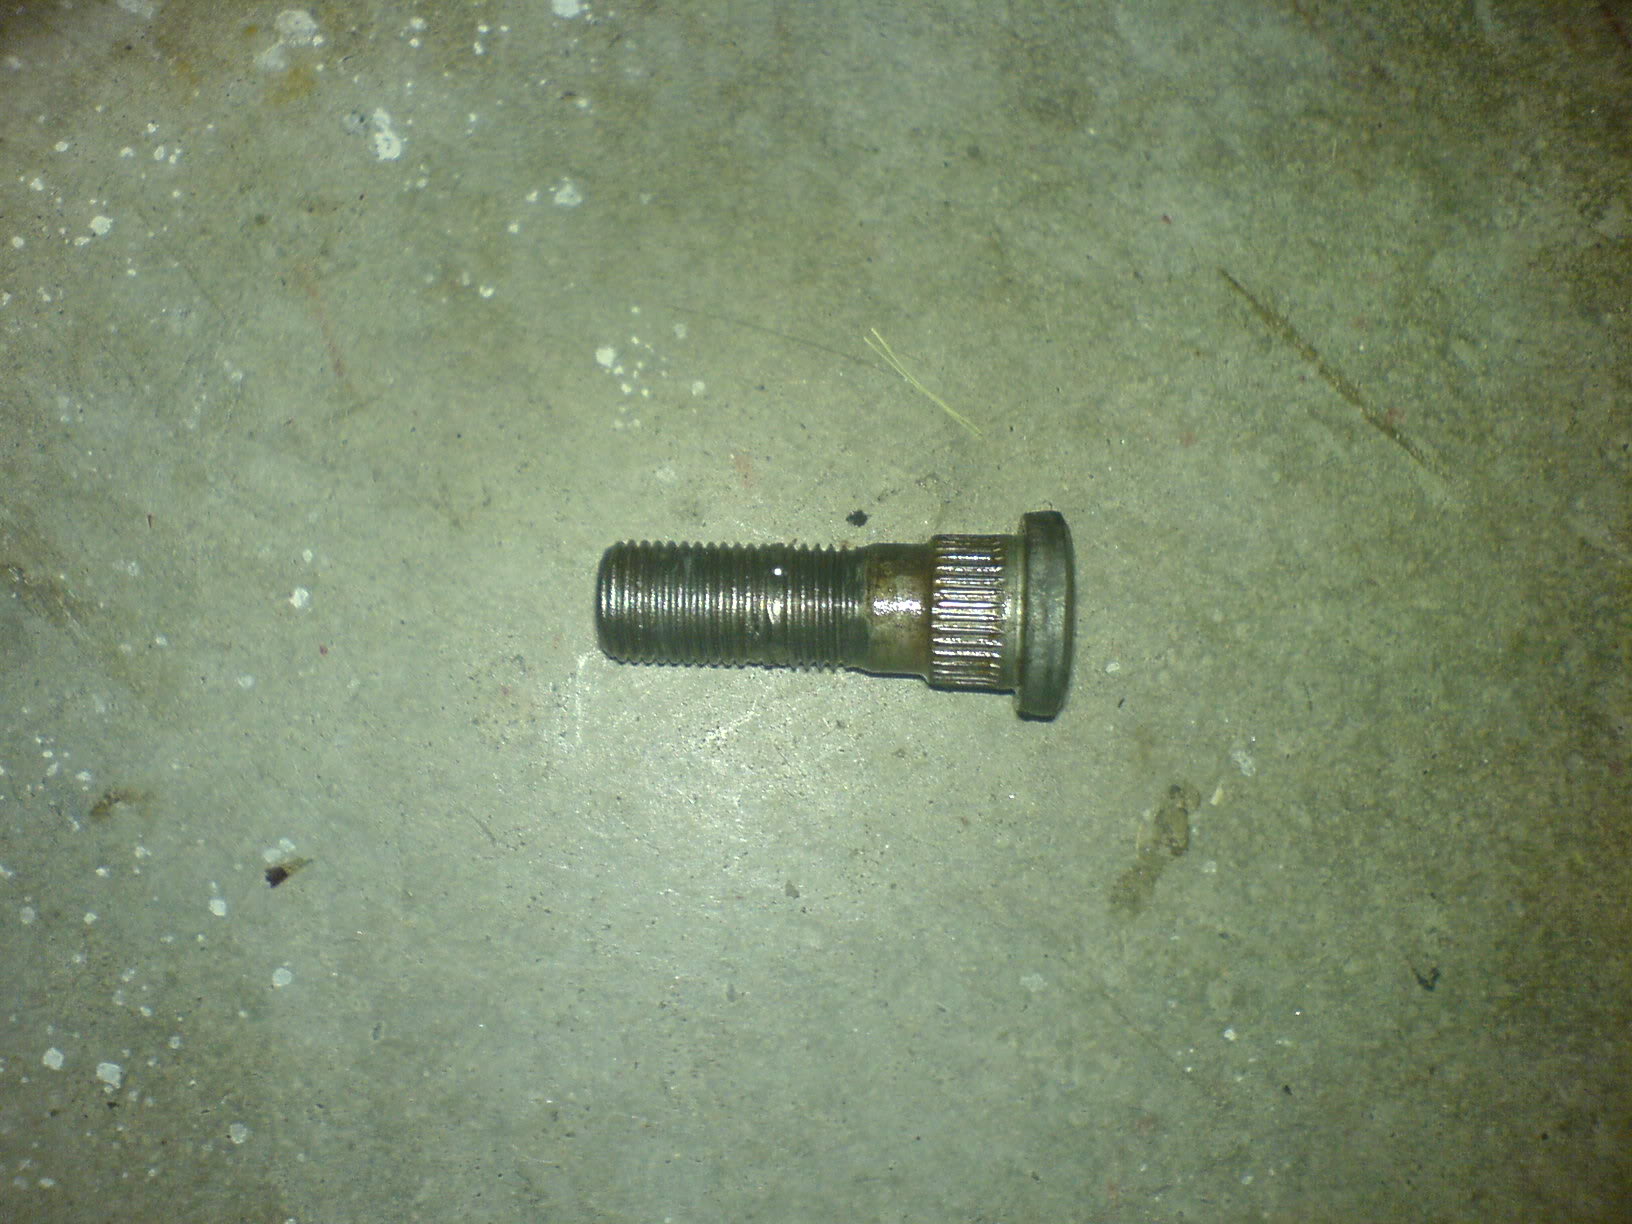
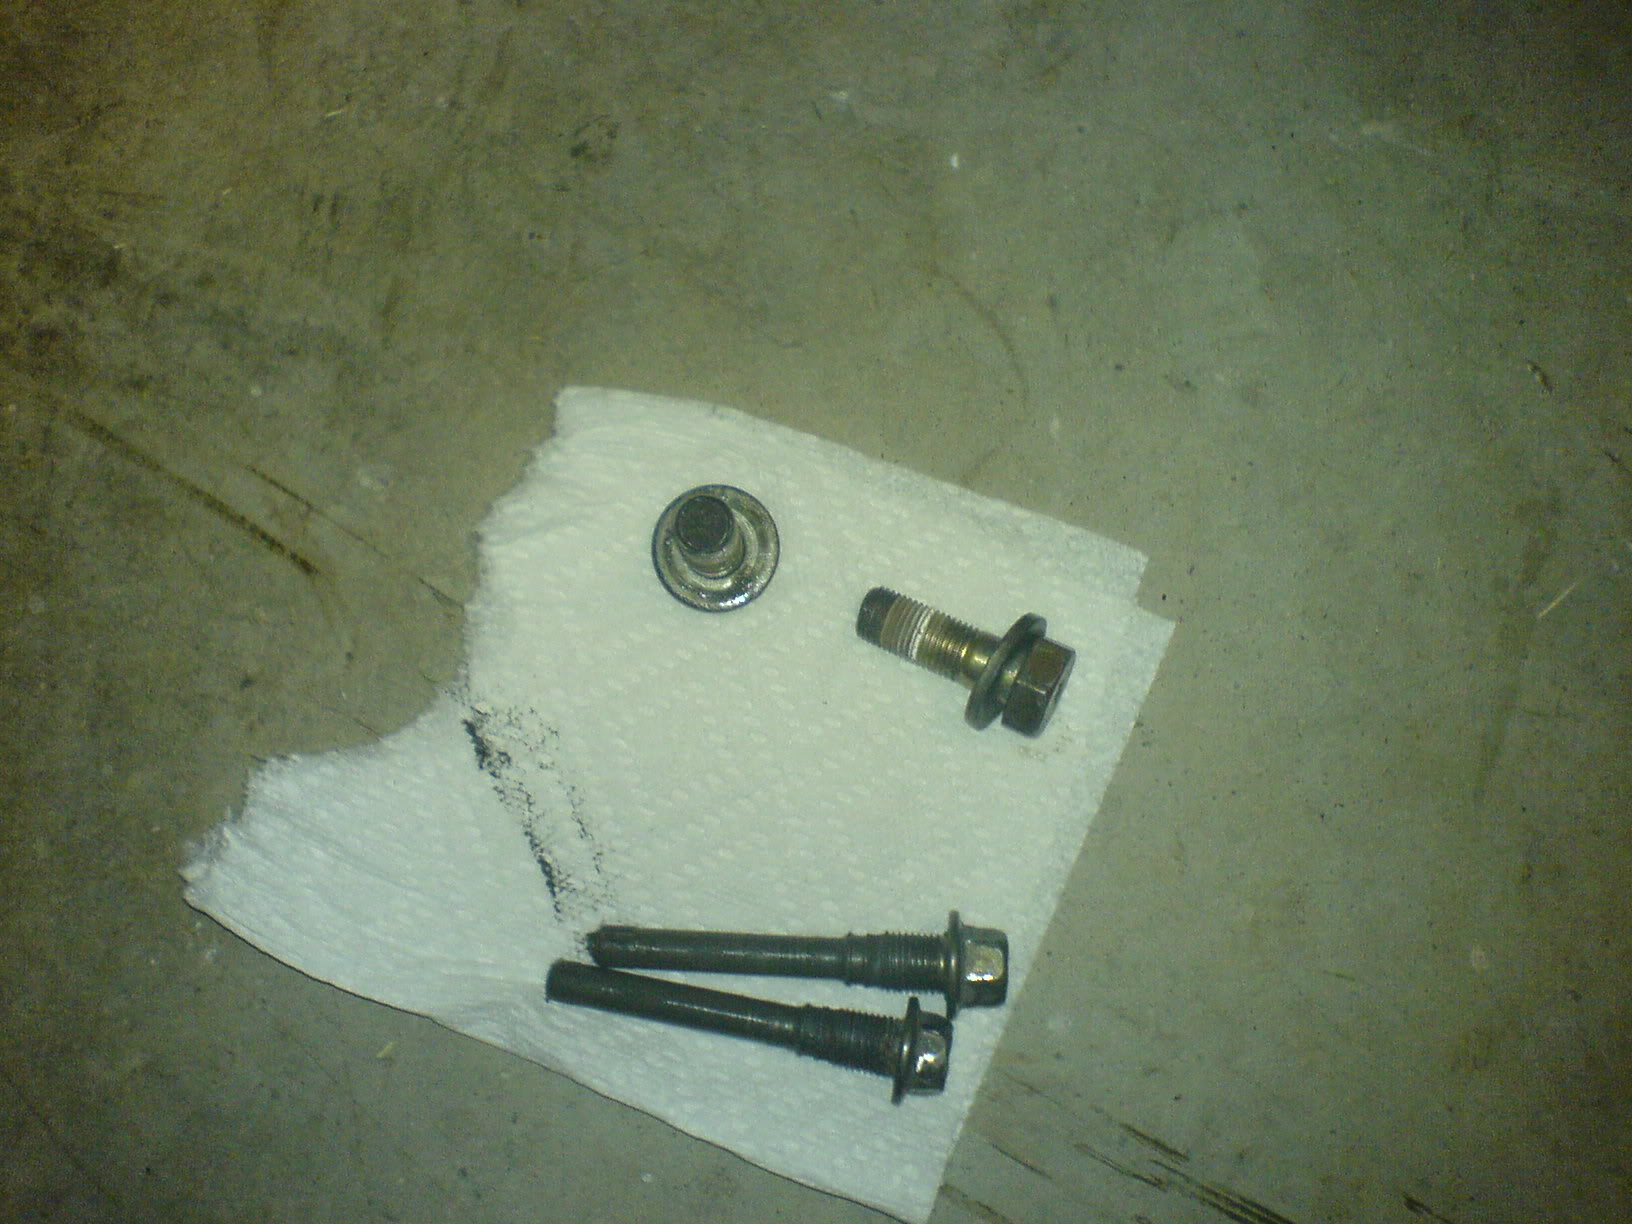
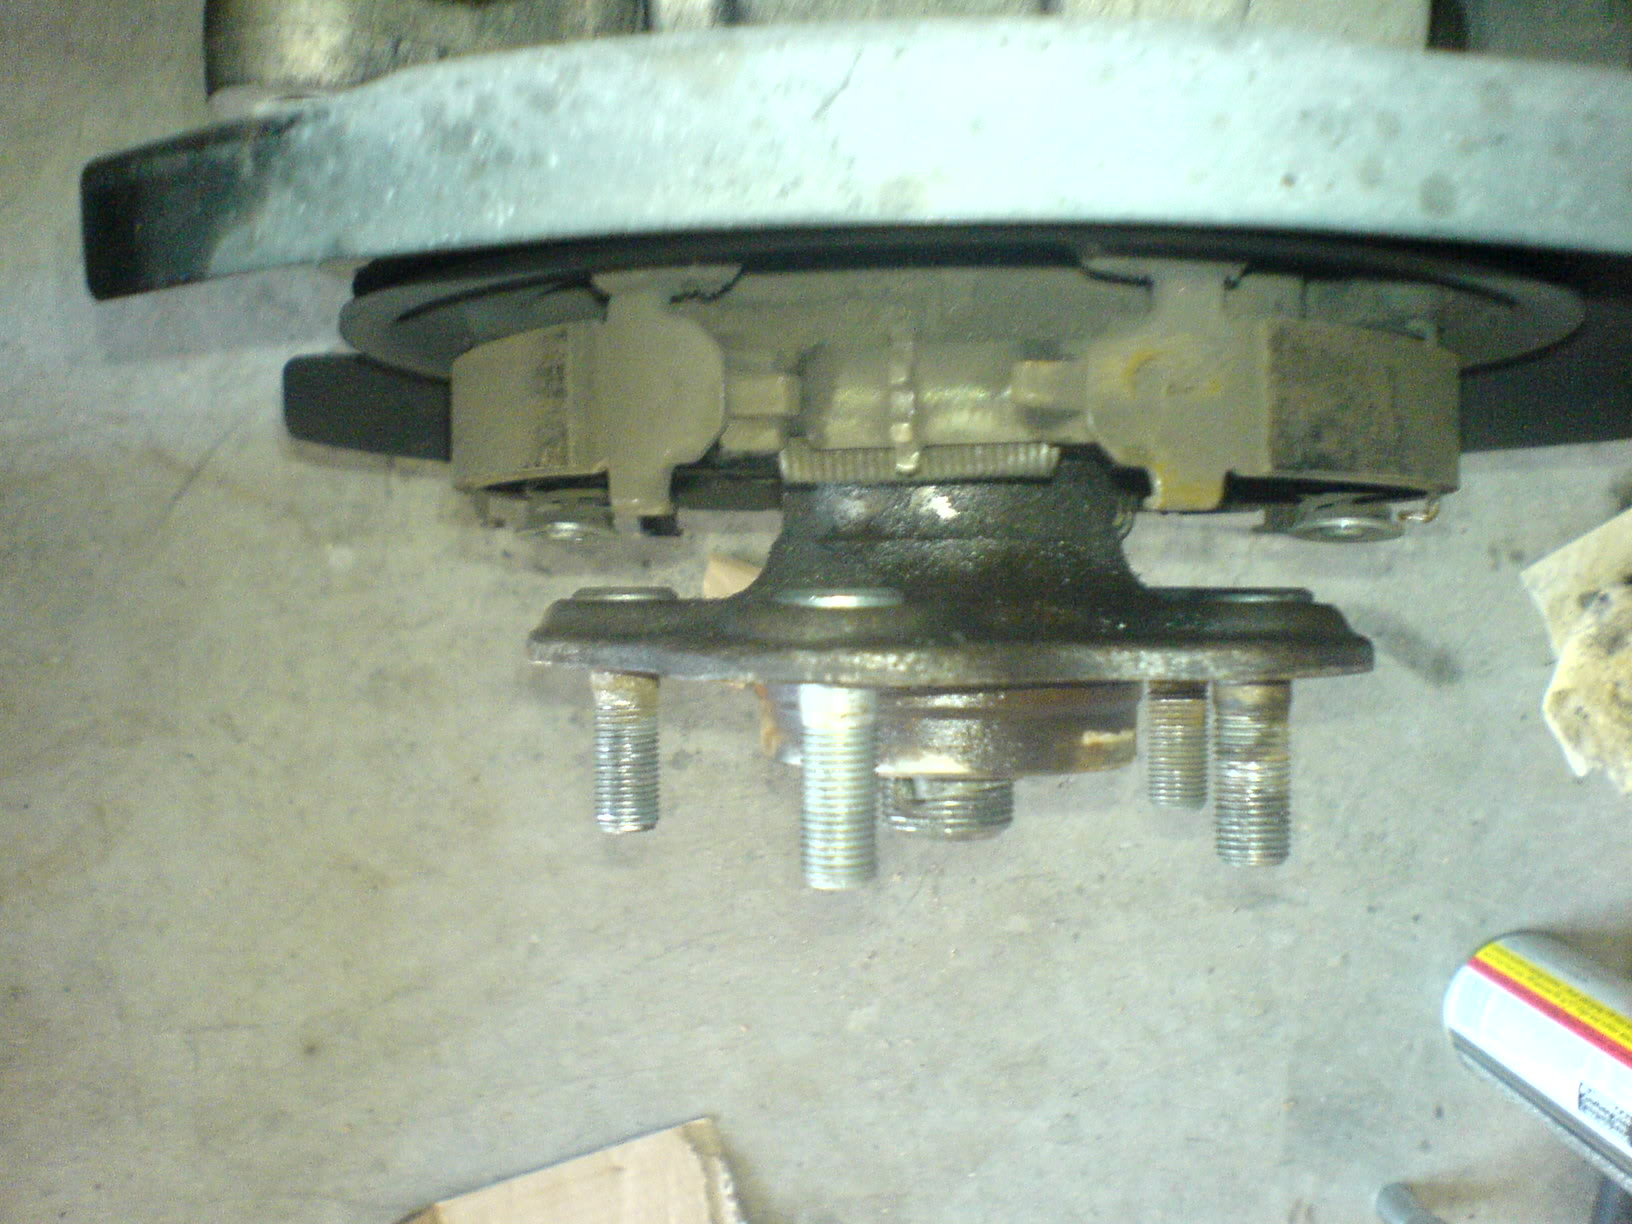
11: Spray the new stud down with wd-40/pb blaster/liquid wrench and put it through the hole where the broken stud was. Place ~6 washers on the stud and tighten the lug nut. Stop tightening when you can feel the head of the stud become flat like the other studs.

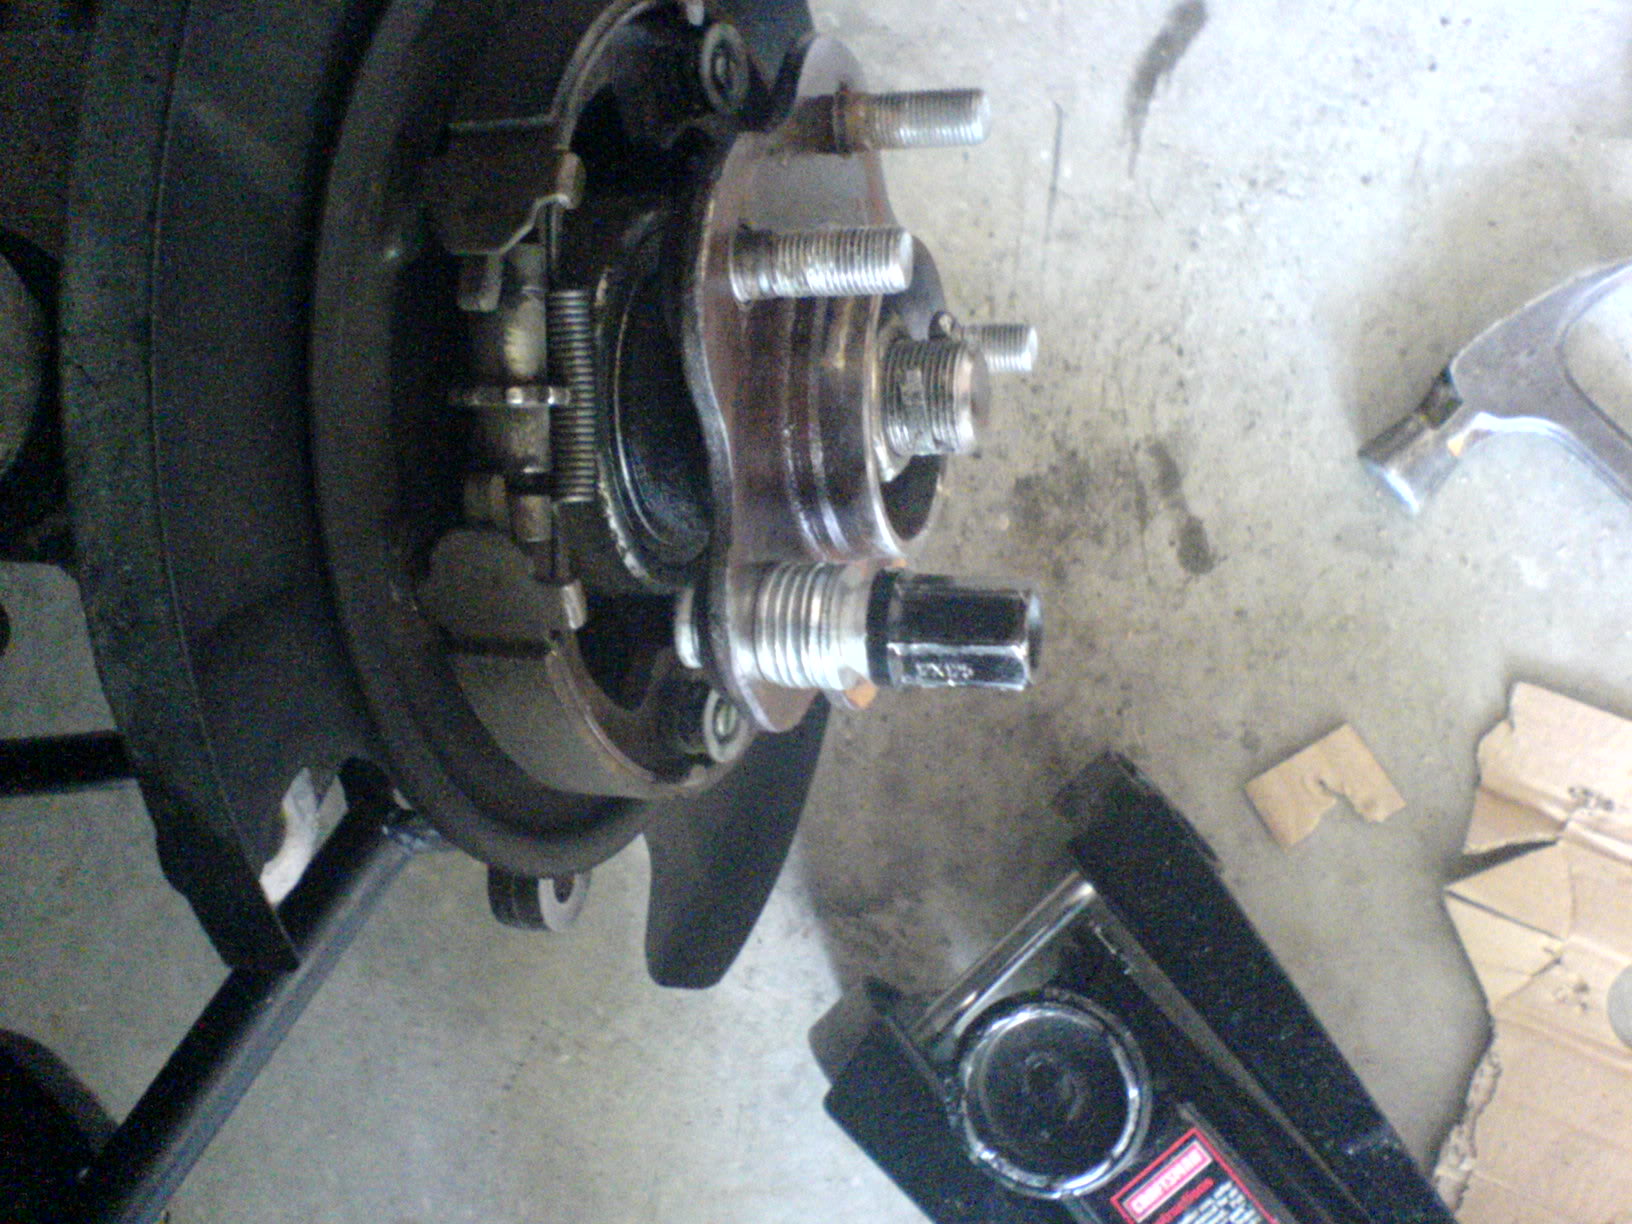
12: You're done! It should look like this.
13: Now put everything back together in the opposite order that you took them out in.
[self explanatory]
Hopefully, this DIY helps you guys who need their wheel stud(s) replaced.
level of difficulty:
1.5 out of 5 (5 being hardest)
approximate install time:
45-90 minutes
tools:
floor jack and jack stands
socket wrench/ratchet
14mm (9/16") and 19mm (3/4") sockets
wd-40 or pb blaster or liquid wrench
~6 washers
hammer or mallet
Replacing the wheel stud:
*I did the rear left side. The fronts should involve the same steps, but may or may not require different socket sizes.
1: Jack up the car high enough using the standard jack points (or frame) so you can slide under the car easily.
2: Remove the wheel, exposing the studs, rotor, brake components, etc.
3: Locate the two 14mm bolts holding the brake caliper in place and remove them.
*Spraying the bolts with wd-40/pb blaster/liquid wrench makes the job much easier, especially if these bolts have not been removed recently.
**The bottom bolt cannot be taken off due to limited space behind it, so I used my floor jack to push up the suspension to create more space.
4: Put the bolts some place where the grease won't collect stuff off the ground.
5: Rest the brake calipers so that it does not put any strain (put weight on) the brake lines. Take off the brake pads, if you haven't already.
6: Locate the two 19mm bolts holding the brake caliper bracket in place and remove them.
*Spraying the bolts with wd-40/pb blaster/liquid wrench makes the job much easier, especially if these bolts have not been removed recently.
**I couldn't take off the bolts by hand so I used the floor jack (while making sure the socket is on the bolt completely as to not strip it).
7: Put the bolts some place where you won't lose them.
8: Remove the brake caliper bracket and the rotor and set it aside. They should just slide right out.
9: Spray wd-40/pb blaster/liquid wrench where the broken stud is and around it. Hammer away at the broken stud. (Optional: thread in an old/useless lug nut a little bit for added length and to prevent the stud from flying somewhere)
*Alternatively, you can use a C-clamp or something similar to get the stud out, if you don't feel comfortable hammering.
10: Take out the broken stud.
11: Spray the new stud down with wd-40/pb blaster/liquid wrench and put it through the hole where the broken stud was. Place ~6 washers on the stud and tighten the lug nut. Stop tightening when you can feel the head of the stud become flat like the other studs.
12: You're done! It should look like this.
13: Now put everything back together in the opposite order that you took them out in.
[self explanatory]


 08-16-2007, 06:28 PM
#2
Retired Admin
Thread Starter
iTrader: (95)
I'm assuming that if you're tackling this task, you know how to get your brake components out of the way, including the rotor.
Required:
Instructions are similar to the above (rears), but much simpler.
Required:
- ARP 100-7716
- closed-ended lug nut
- hammer
- 10+ washers
- open-ended lug nut with no lip & matching deep socket
- impact gun
Instructions are similar to the above (rears), but much simpler.
- Press out or bang out (using a closed-ended lug nut and hammer) the old wheel studs
- Slide in the new stud

- Use ~10 washers, open-ended lug nut with no lip with the flat side facing the washers, and an impact gun to seat the new studs (may want to lube the stud and the hole)
- Repeat for the remaining studs

Last edited by 3hree5ive0ero; 12-01-2012 at 09:35 PM. Reason: update with ARP fronts!
08-16-2007, 06:28 PM
#3
Retired Admin
Thread Starter
iTrader: (95)
I understand that using a press may be preferable, but I don't have that and this is how I did it. You assume the risk if you choose to follow this DIY and I cannot be held accountable for anything that you do.
With that being said, I'm assuming that if you're tackling this task, you know how to get your brake components out of the way, including the rotor.
Required:
With that being said, I'm assuming that if you're tackling this task, you know how to get your brake components out of the way, including the rotor.
Required:
- ARP 100-7716
- 14mm, 17mm
- needle nose pliers/vice grip
- flat head screw driver
- closed-ended lug nut
- hammer
- 10+ washers
- open-ended lug nut with no lip & matching deep socket
- impact gun (optional)
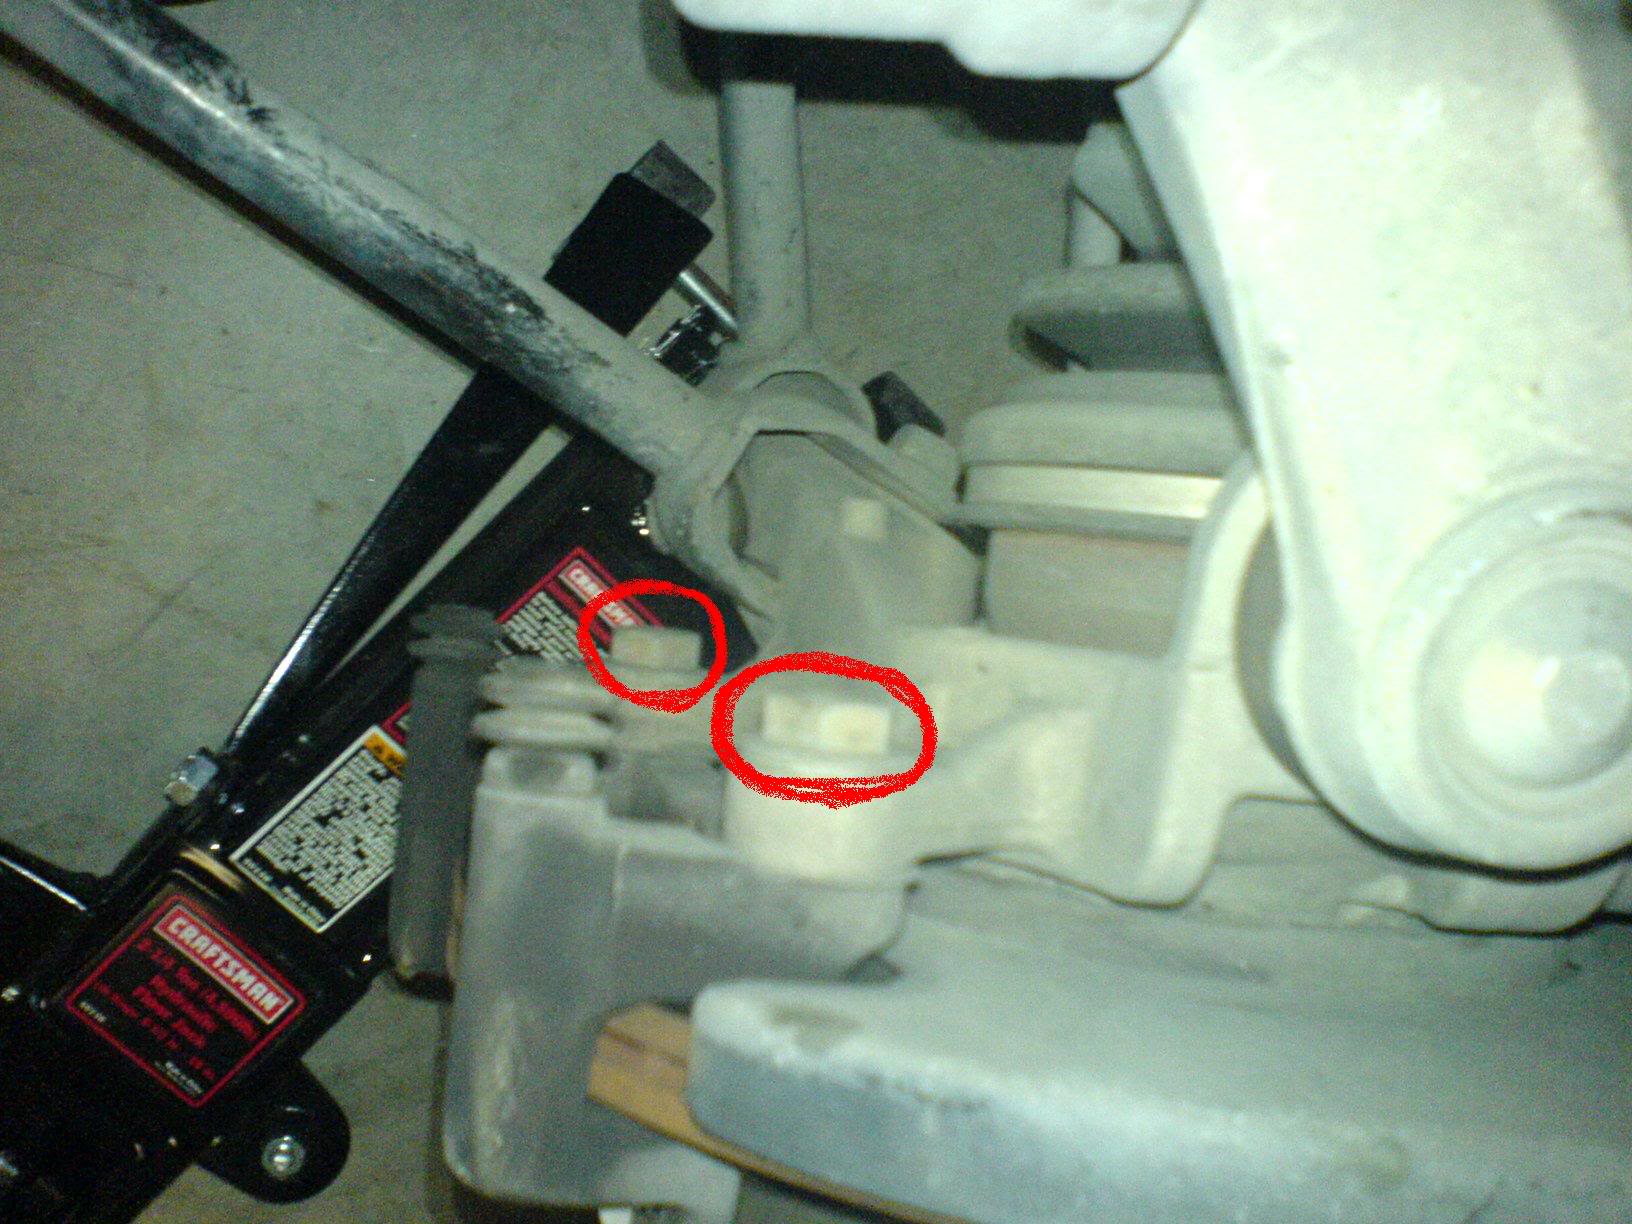
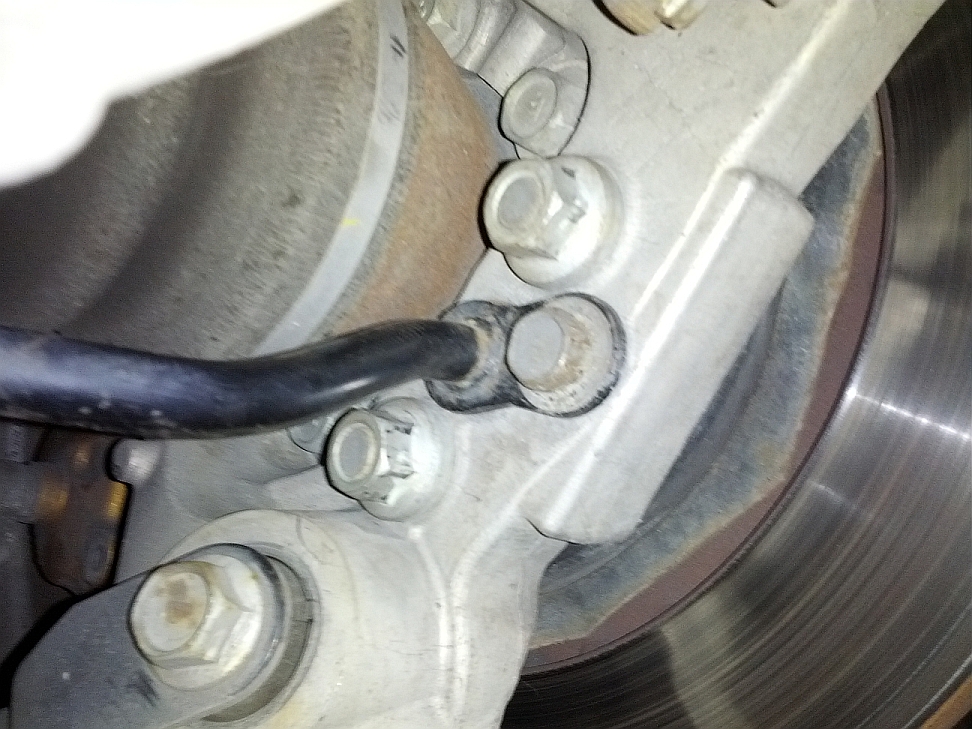
- Look behind the hub and loosen the one 14mm bolt, then loosen both 17mm nuts:
- Using a needle nose unhook the spring located toward the bottom of the e-brake assembly:

- Make sure you take note of this piece down here because you'll be taking it apart and putting it back together later:
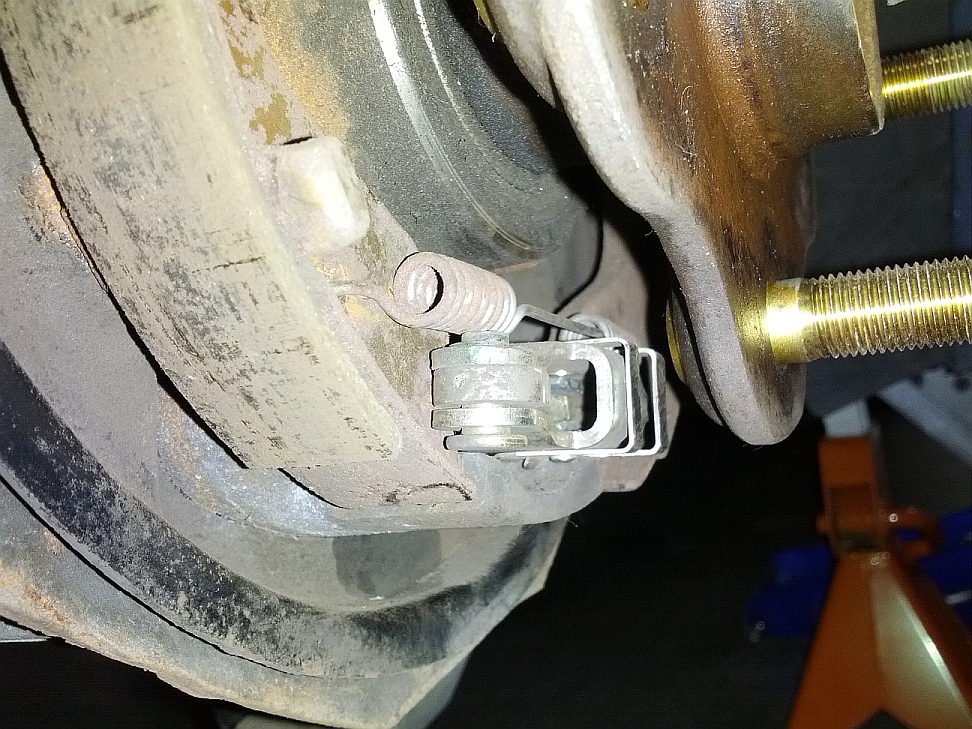
- Unhook the spring from this side and get it out of the way:
- Unhook the spring from the top of the e-brake assembly.
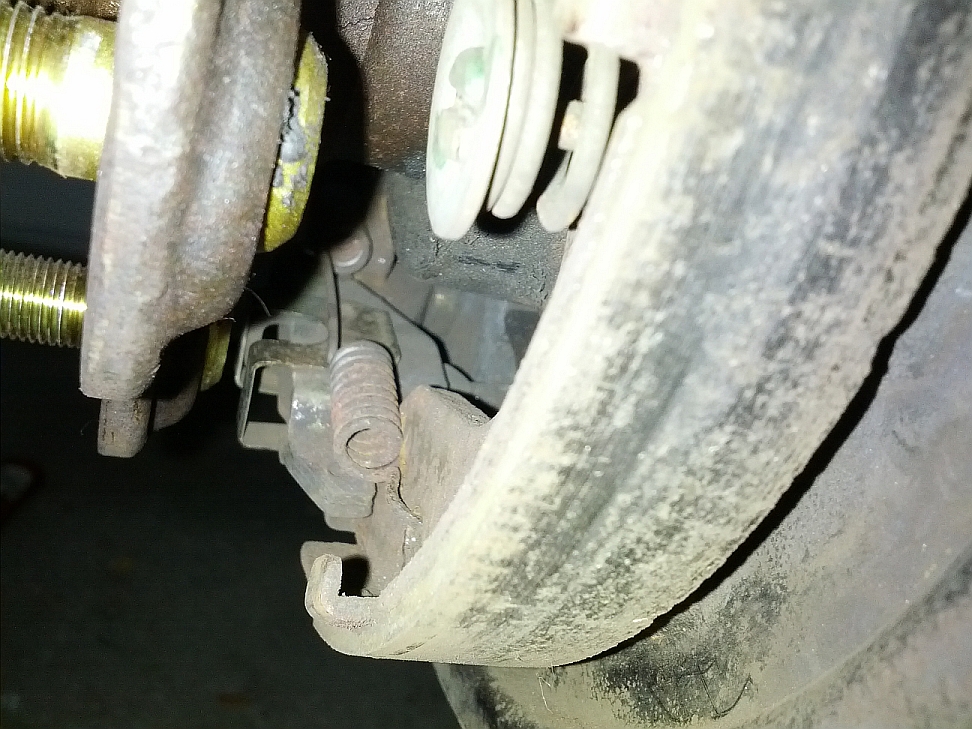
- Use a flat head and turn the screw 1/4 turn to let the screw out:

- Wiggle, or use your finger/screw driver, out the pin:

- What it looks like (remember the orientation):
- From behind the hub, pull out the e-brake cable (kind of looks like outlet plugs from the front side) and put it aside out of the way:

- Slide this bracket out:

- Press or bang out (put a closed-ended nut and hammer) the old wheel stud if you haven't already. Make sure you sprayed it down with some PB Blaster or WD-40.
- With more room (where the e-brake cable was), you should now be able to slide the ARP stud with ease.
 Dont' forget to lube the wheel stud and the hole.
 - Use lots of washers, open ended nut with no lip with the flat side toward the washers, and an impact (optional) to seat the wheel studs (make sure you watch the stud from the behind the hub to know when to stop):
- Repeat for the rest, then work your way backwards making sure everything is seated as it was before dis-assembly
- It's likely that your rotor will not fit over the e-brakes that you just assembled. If so, fiddle with rotating gear (read: e-brake adjuster seen in step 5) so that your e-brakes are expanded to the size that's just smaller than the inner diameter of the rotor.
Last edited by 3hree5ive0ero; 12-01-2012 at 09:10 PM. Reason: update with ARP rears!
 08-16-2007, 06:57 PM
#5
Retired Admin
Thread Starter
iTrader: (95)
I did hear that, but i highly doubt hammering it will affect it too much. As long as you spray it down with copious amounts of pb blaster (which I used), it doesn't take too much effort hammering it out.
08-16-2007, 07:06 PM
#6
Registered User
iTrader: (10)

Join Date: Jan 2006
Location: St. Louis
Posts: 899
Likes: 0
Received 0 Likes
on
0 Posts
Just to make it easier, you could have started with step 6. There is no need to remove the slide bolts with grease on them to remove the whole caliper if you are taking off the bracket as well...
Just my , thanks for the write up!
Just my
, thanks for the write up!

Trending Topics
08-16-2007, 07:11 PM
#8
Retired Admin
Thread Starter
iTrader: (95)
Originally Posted by 06blueZ
Just to make it easier, you could have started with step 6. There is no need to remove the slide bolts with grease on them to remove the whole caliper if you are taking off the bracket as well...
Just my, thanks for the write up!
Just my
, thanks for the write up! 08-17-2007, 01:58 PM
#10
Good write up and good pics. Small comment on the 19" bolts.
The method of the jack and the socket is kind of dangerous. That can slip out and go off flying and hurt something, or worse, damage the car. And, I don't think your socket wrench will last long doing that.
The proper tool is a breaker bar. I got one in a 1/2" drive and boy it makes easy work of about anything. If you plan to do a lot of suspension work on your car, brakes, etc, I highly recommend picking one up. It will save your time, your knuckles, and your socket wrench.
Now, the trick of the breaker bar is on the length of the bar. So another way to make this go is to extend your socket wrench arm with a tube of some kind. Back before I had my breaker bar I used to use the handle of my jack. Just slip the socket handle into it, and go. An extra foot of leverage will do the job nicely.
To put the bolt back you should use a torque wrench, and there is another long armed device that can help you take things off. Most people think of the torque wrench to put things on, but it can take the same bolt off easily. Again, the trick is on the length of the leverage.
One more option : there is a way to interlock two open end wrenches to make up a longer armed wrench. Under some situations this is a good trick to get a bolt started. Be careful because this can also slip and it can hurt.
Nothing beats the right tool. You will save so much time and frustration you will not know how you lived without it before. One 1/2" breaker bar can make any suspension/brake or tranny job a stroll in the park.
Oh, and another tip. Along my car travels I picked up a set of sockets of the kind you use for power tools (compressors, air tools). They are black and MUCH harder than regular sockets. They are great for work on suspension and brake jobs, and they won't eat up the bolts (as easily). They are heavy, so I keep a regular set but also have these for those tough jobs. Is a few extra bucks, but I bought them 10+ years ago and have never had to replace one.
Last edited by slaponte; 08-17-2007 at 02:05 PM.
 08-17-2007, 07:12 PM
#12
Retired Admin
Thread Starter
iTrader: (95)
Originally Posted by cubu
wow another stud.... you should start using a tq wrench, good right up! you still have that headlight?
And yes, I still have have the headlight casing. You never showed up to pick it up at any of the places.
 I have to go find it again and you'll have to come to McKinney to get it now.
Slaponte, I do have a breaker bar, but it didn't fit with the socket. Go figure. The jack method isn't too bad. I made sure that it wouldn't fly off or strip the bolt by holding it down on the bolt securely with my right hand while jacking it up with my left. Breaker bars that fit would definitely help, too, though.
Redlude97, I thought about putting it in the freezer, but that seems like it may hurt it as any material will break more easily when in lower temperatures. I have heard it before, however.
 01-26-2008, 11:26 PM
#14
Retired Admin
Thread Starter
iTrader: (95)
Originally Posted by ilovegirls
thanks for the right up. is there a better way rather than pounding the stud out with a hammer? how do the shops do it?
 04-07-2008, 12:26 AM
#16
04-07-2008, 03:54 PM
#17
Registered User
iTrader: (11)
Join Date: Apr 2006
Location: My own world!
Posts: 7,723
Likes: 0
Received 0 Likes
on
0 Posts
Tried doing this with my buddy, that bolt was so hard when i cranked it with my own strength my whole nipple of the ratchet twisted off. now i only have 2. things are no joke to get off. wd-40 did not help much. Did not think of the jack though.
things are no joke to get off. wd-40 did not help much. Did not think of the jack though.
04-07-2008, 04:17 PM
#18
Retired Admin
Thread Starter
iTrader: (95)
Originally Posted by imonlykidden
Tried doing this with my buddy, that bolt was so hard when i cranked it with my own strength my whole nipple of the ratchet twisted off. now i only have 2. things are no joke to get off. wd-40 did not help much. Did not think of the jack though.
things are no joke to get off. wd-40 did not help much. Did not think of the jack though. I have a better breaker bar now, though, thanks to it breaking.
Yeah, using the jack (which can put much more force than you can) definitely helps. If you have a long enough breaker bar or a pipe to lengthen, it'll make things a lot easier.
10-27-2008, 01:14 PM
#19
New Member
iTrader: (1)

Join Date: Aug 2007
Location: nowhere
Posts: 38
Likes: 0
Received 0 Likes
on
0 Posts
Thanks for posting this. I just painted my brake calipers, but in the process I had a lugnut cease up on me and eventually broke the damn stud trying to break it free. I'll definitely be using this in the near future to replace it.
10-30-2008, 02:52 PM
#20
Registered User
iTrader: (15)

Join Date: Apr 2006
Location: Baltimore
Posts: 2,918
Likes: 0
Received 0 Likes
on
0 Posts
Nice.
Does removing this stud apply to any other stud that is "pressed" on the Z?
Because on my rear shock mounts (the 2 bolts that come down from the frame) one bolt is slightly bent. If I pb blast it and start hammering, will it come out?
Does removing this stud apply to any other stud that is "pressed" on the Z?
Because on my rear shock mounts (the 2 bolts that come down from the frame) one bolt is slightly bent. If I pb blast it and start hammering, will it come out?